You open your Lenovo laptop thinkPad, IdeaPad, does not matter and the screen does something wrong. Horizontal lines slice across the panel. Or it is a flat black void with the fan spinning in the background. Or there is a milky white blob in the corner that definitely wasn’t there last night. Your stomach drops and you immediately start pricing replacements.
How to Fix Lenovo Laptop Screen Problems?
Here is what you need to know right now over 80% of Lenovo screen issues are software glitches. Not dead hardware, not a €300 repair bill a driver conflict, a wrong refresh rate setting, or a power state that needs clearing. You can fix them at home, for free, without touching a single personal file. This guide on how to fix Lenovo laptop screen problems covers every scenario from the 10-second keyboard shortcut fix all the way to LCD panel replacement in plain language, in the right order.
Quick Answer: Most Lenovo laptop screen problems can be fixed without replacing the screen. Common causes include graphics driver issues, incorrect display settings, Windows update conflicts, or temporary software glitches. Start by performing a graphics driver refresh (Windows + Ctrl + Shift + B), restarting the laptop, updating display drivers, and testing with an external monitor. If the issue also appears in BIOS or changes when moving the screen, the problem may be related to the display cable or LCD panel.
Let’s work through this properly.
Lenovo Screen Troubleshooting Matrix: Hardware vs. Software Glitch
Scan this table first. Match your exact symptom, check which tests confirm it, and jump straight to the right section. This saves you from chasing driver fixes when the panel is physically cracked or booking a technician when a 10-second shortcut would have solved it.
| Your Symptom | Most Likely Cause | Confirming Test | Go To |
|---|---|---|---|
| Black screen, fan running, keyboard lit | Display driver crash or black screen of death | Win+Shift+Ctrl+B recovers it | Fix 1 / Section 3 |
| Flickering screen rapid flash | Wrong refresh rate or outdated driver | Task Manager stays steady = software | Fix 4 / Section 4 |
| Flickering gets worse at certain hinge angles | Loose or fatigued display cable | Flex hinge gently worse? = hardware | Section 5 |
| Horizontal lines across full screen | Driver error OR damaged LCD row | Lines in BIOS = hardware | Section 6 |
| Vertical black lines fixed position | Dead LCD pixel column (hardware) | External monitor fine = LCD fault | Section 7 / Replace |
| White spot or bright blob on screen | Diffuser layer damage (hardware) | Spot visible even over white = hardware | Section 8 |
| Screen black, external monitor works fine | Display cable or LCD panel fault | External monitor shows desktop | Section 5 |
| Screen fine in BIOS, breaks in Windows | Graphics driver or software conflict | BIOS test stable = software | Section 3 |
| Dim screen, no brightness response | Backlight driver or Fn key setting | Fn + brightness key test | Fix 2 / Section 3 |
| Laptop shows no signs of life at all | Power/battery fault — not a screen issue | No fan, no LED, no sound = power fault | Section 9 |
How to Fix Lenovo Laptop Screen Problems?
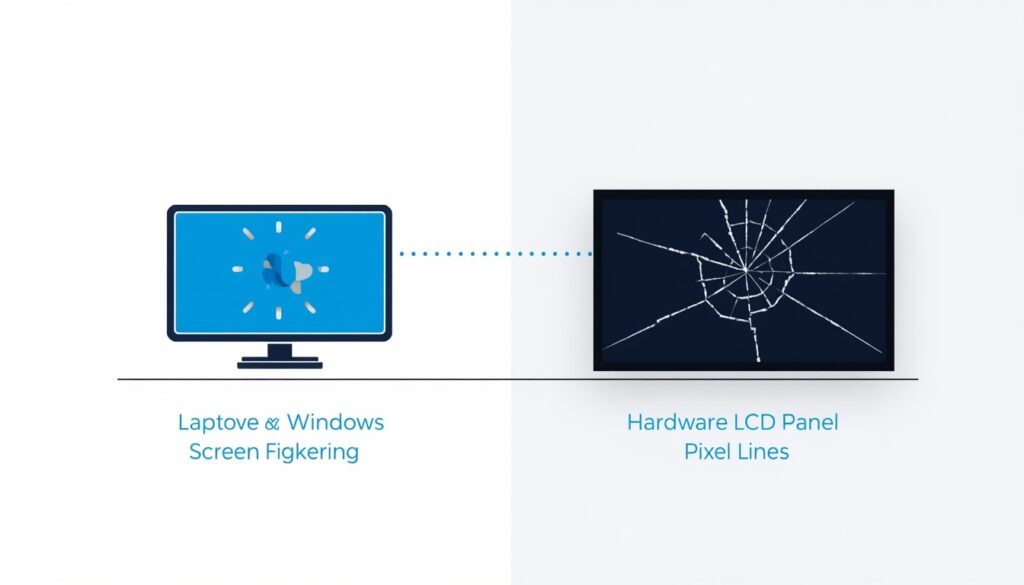
Quick rule: if the problem appears in BIOS, it’s hardware. If it only appears in Windows, it’s software. The external monitor test settles 90% of ambiguous cases.
How to Fix Lenovo Laptop Screen Problems?
Section 1: What Type of Lenovo Laptop Display Issues Do You Have?
Lenovo laptop display issues split into a handful of repeating symptom types. Knowing which category you are in tells you immediately whether you’re solving a software problem or a hardware failure and that distinction saves hours.
Black Screen (Laptop Is Powered On)
The fan spins, the keyboard backlight is on, maybe you hear Windows startup sounds but the panel is completely black. This is the most common Lenovo laptop display problem reported across ThinkPad and IdeaPad lines. It is usually a display driver crash or a stuck power state. Rarely is it a dead screen.
Screen Flickering with Horizontal Lines
Flickering horizontal lines whether rapid and rhythmic or random bursts are almost always a software signal on Lenovo laptops. Wrong refresh rate and a corrupted graphics driver are responsible for the majority of these cases. When flickering gets worse when you flex the screen hinge, that’s the exception: it points to a fatigued display cable.
Black Lines on Laptop Screen Lenovo Specific
Horizontal black lines that appear and disappear can be driver-related. Vertical black lines that stay fixed regardless of what’s displayed are almost always a dead pixel column physical LCD damage. These two look similar but require completely different fixes, and confusing them wastes a lot of time.
White Spot on Lenovo Laptop Screen
A white or bright blob on a specific part of the screen usually a circle or irregular shape is a damaged diffuser layer behind the LCD panel. This is hardware, not software. Section 8 covers this completely, including whether a warranty claim or DIY repair is realistic.
Screen Works on External Monitor, Not on Internal Display
When you connect HDMI and your desktop shows up perfectly on an external screen while the laptop panel stays blank, the GPU and motherboard are healthy. The fault lives in the internal display path the display cable, the LCD connector, or the panel itself.
Lenovo Laptop Display Problem After Windows Update
A Windows update that pushes a new GPU driver is a very common trigger for display problems on Lenovo laptops. Flickering, black screens, and wrong resolution settings can appear overnight with no physical cause. Section 3 covers the driver rollback and reinstall process specifically for this scenario.
Section 2: Three Tests to Run in the First 60 Seconds
Before changing any setting or reinstalling any driver, run these three tests. They tell you everything you need to know about where the fault lives and which fixes to try first.
Test 1: The Task Manager Flicker Test (30 Seconds)
This test identifies whether your flickering is a software conflict or a driver/hardware issue in about half a minute.
- Press Ctrl + Alt + Delete and open Task Manager.
- Watch closely: does the Task Manager window flicker with the rest of the screen, or does it stay steady while the background flickers?
Task Manager stays steady, background flickers: This is a software conflict a third-party app or overlay is interfering with the display. Jump to Fix 5 in Section 3.
Task Manager flickers along with everything else: This is a driver-level issue. A graphics driver refresh will almost certainly fix it. Go to Fix 3 in Section 3.
Test 2: The External Monitor Test
Connect an HDMI cable between your Lenovo laptop and any external TV or monitor. Power on and observe.
External screen shows your desktop normally: Your GPU and motherboard are fine. The fault is inside the internal display cable, connector, or LCD panel. Go to Section 5.
External screen is also black or distorted: The problem is deeper possibly GPU, motherboard, or a system-level crash. Go through software fixes first before considering hardware diagnosis.
Test 3: The BIOS Screen Test
Restart the laptop and press F2 immediately after the power button to enter BIOS. Watch the BIOS screen for a full minute.
BIOS screen is clean and stable: 100% software problem. The hardware is fine. Work through the software fixes in Section 3.
Flickering or lines appear in BIOS: Hardware fault confirmed driver reinstalls will not help. Go to Sections 5–8 depending on your specific symptom.
Section 3: How to Fix Lenovo Laptop Screen Problems Software Fixes
Work through these fixes in order. The majority of Lenovo laptop display issues get resolved by Fix 1 or Fix 3. None of these will delete your files.
Fix 1: The Win+Shift+Ctrl+B Keyboard Shortcut (10 Seconds)
This is the fastest possible fix for a black screen or frozen display on a Lenovo laptop. It sends a signal to the GPU to restart the display driver immediately no reboot required.
Hold Windows Key + Shift + Ctrl + B all at once. The screen will flash black for a second, then come back. Wait 30 seconds for it to fully recover.
If this works, the problem was a temporarily crashed or frozen display driver — a software glitch, not a hardware failure. No further action needed unless it repeats.
Fix 2: Check Brightness (Fn Key)
This sounds too simple but it is responsible for a surprisingly large number of black screen reports. An accidental keypress can drive brightness to zero.
Press Fn + F5 or Fn + F6 (varies by model) or Fn + the up arrow key to raise brightness. Press it six or seven times and wait.
If the screen gradually brightens, the backlight was simply turned down. Done.
Fix 3: Full Graphics Driver Refresh The Most Effective Software Fix
A corrupted, outdated, or conflicting graphics driver is responsible for the majority of Lenovo laptop display problems black screens, flickering horizontal lines, wrong resolution, colour distortion. The graphics driver refresh procedure below uninstalls both the display adapter driver and the monitor driver, which is the step most guides miss.
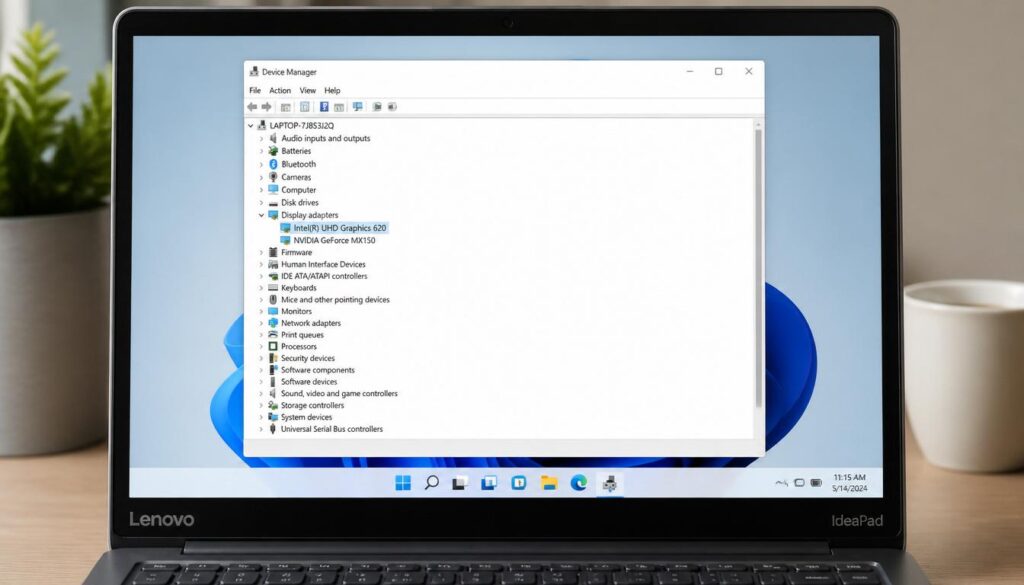
- Right-click the Start button and open Device Manager.
- Expand Display adapters.
- Right-click your Intel, AMD, or NVIDIA adapter and select Uninstall device. Tick “Delete the driver software for this device” if that checkbox appears.
- Now go back up and expand Monitors.
- Right-click the listed monitor and select Uninstall device.
- Restart the laptop. Windows reinstalls basic drivers automatically.
- Visit support.lenovo.com, enter your exact model number, and download the latest graphics driver listed for your machine.
- Install the downloaded driver and restart again.
How to Fix Lenovo Laptop Screen Problems?
After the graphics driver refresh, test the screen under different conditions: open the lid slowly, let it sleep and wake, play a video. Most flickering and black-screen issues clear at this step.
Pro tip: Use Lenovo Vantage (pre-installed on most models) to check for driver updates. It pulls the exact driver certified for your hardware revision, which matters more on ThinkPads than generic driver packs.
Driver issues are not limited to laptop screens alone. If your Lenovo laptop also shows slow performance, freezing, or startup delays alongside the display problem, there is often a deeper Windows-level cause. Our guide on Windows 11 Debloater: The Safe Way to Speed Up Your PC covers how background bloatware and outdated system drivers silently drag down performance — and how to clean them out safely without reinstalling Windows.
Fix 4: Correct the Refresh Rate in Display Adapter Settings
A Windows Update silently resetting the refresh rate is one of the most common causes of sudden screen flickering on Lenovo laptops. The fix takes under two minutes.
- Right-click the desktop and open Display Settings.
- Scroll to Advanced display settings.
- Click Display adapter properties for Display 1.
- Go to the Monitor tab.
- Under Screen Refresh Rate, set it to 60 Hz for standard IdeaPads. For Legion gaming models, match the value to your panel spec (144Hz or 165Hz).
- Click Apply, then OK.
Wrong display adapter settings after a Windows Update are responsible for a large percentage of “my screen started flickering after the update” complaints. This fix usually takes care of it.
Fix 5: Remove Recently Installed Apps
Screen recording tools, GPU overlay software, antivirus apps, and even some browser extensions can create conflicts that make the display flicker or behave erratically.
Think back to when the problem first started. Did you install anything that day? Open Control Panel > Programs > Programs and Features, click the Installed On column to sort by date, and uninstall anything added around the time the issue appeared. Restart and test.
Fix 6: Roll Back a Windows Update
If the display problem appeared within a day or two of a Windows Update, rolling back that specific update is worth trying before anything else.
- Open Settings > Windows Update > Update History.
- Click Uninstall updates.
- Sort by date and identify the most recent update.
- Uninstall it and restart.
If the screen returns to normal, pause Windows Updates from Settings > Windows Update > Advanced options until Lenovo releases a compatible driver through Vantage.
Fix 7: Boot into Safe Mode and Test
Safe Mode loads Windows with the minimum necessary drivers. If the screen works fine in Safe Mode, a third-party app or driver conflict is causing the problem in normal Windows.
- Hold Shift and click Restart from the Start menu.
- Select Troubleshoot > Advanced Options > Startup Settings > Restart.
- Press 4 or F4 for Safe Mode.
Screen working fine in Safe Mode = do the graphics driver refresh (Fix 3). Still broken in Safe Mode = hardware fault, move to the next sections.
Section 4: Fixing Flickering Horizontal Lines on a Lenovo Screen
Flickering horizontal lines are one of the most reported forms of Lenovo laptop display problem. Here’s how to fix Lenovo laptop screen problems of this specific type when standard driver fixes have not resolved it.
Step 1: Confirm It’s Not the Refresh Rate
Run Fix 4 from Section 3 first. A wrong refresh rate in display adapter settings is the number one cause of rhythmic horizontal flickering. If the refresh rate is already correct, move on.
Step 2: Check GPU Temperature
Download HWMonitor (free). Watch the GPU temperature while the screen flickers. If the GPU temperature climbs above 88–90°C during normal use not gaming thermal throttling is causing display instability. Clean the laptop’s air vents with compressed air directed through the exhaust. Reapplying thermal paste on the GPU brings temperatures down significantly on older Lenovo models.
While checking GPU temperature, it is also worth making sure your overall system is not running hot due to unnecessary background processes. If you notice CPU usage spiking even during basic tasks like browsing or video playback, your Windows installation may have bloatware running silently. Our Windows 11 Debloater guide shows you exactly which background services are safe to disable and which ones to leave alone.
Step 3: The Hinge Flex Test
How to Fix Lenovo Laptop Screen Problems?
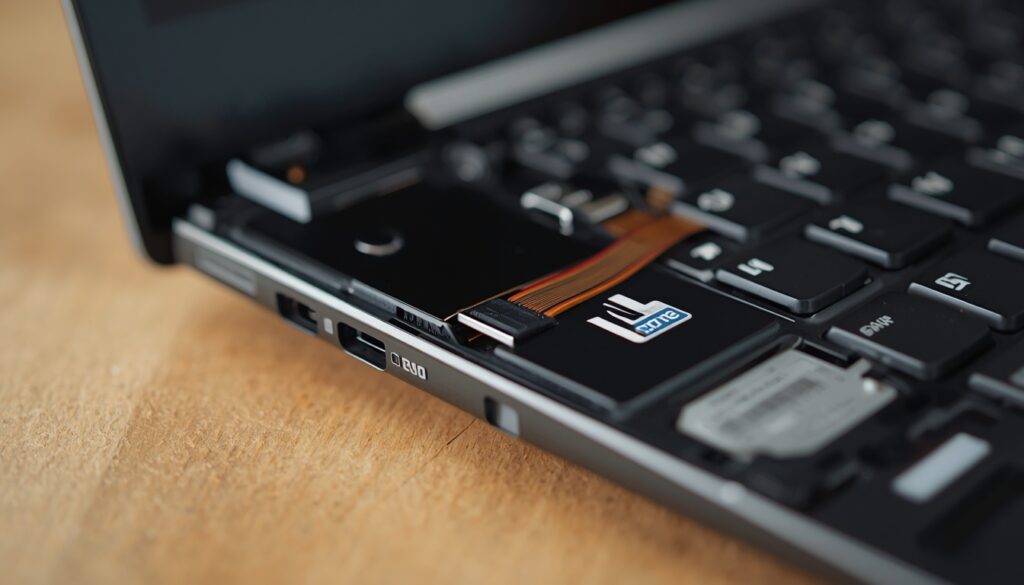
With the laptop powered on and the screen flickering, gently flex the display lid slightly a 5–10 degree movement. If the flickering gets markedly worse or the screen goes black during the flex, the internal display cable running through the hinge has developed a micro-fracture or has worked loose at the connector.
This is the one flickering scenario that’s a hardware fix. On units still under warranty, contact Lenovo support immediately display cable failure at the hinge is a recognized warranty issue on the IdeaPad 3 and 5 series. Out of warranty, a technician can replace the cable affordably.
Step 4: Intel or AMD Panel Self-Refresh Conflict
Some Lenovo models running Intel Iris Xe graphics experience flickering caused by Panel Self-Refresh a power-saving feature that occasionally creates banding artifacts. To disable it: open Intel Graphics Command Center > System > Power and turn off Panel Self Refresh. On AMD systems, go to AMD Software > Display > Custom Color and disable Vari-Bright.
Section 5: Screen Works on External Monitor but Not on the Built-In Display
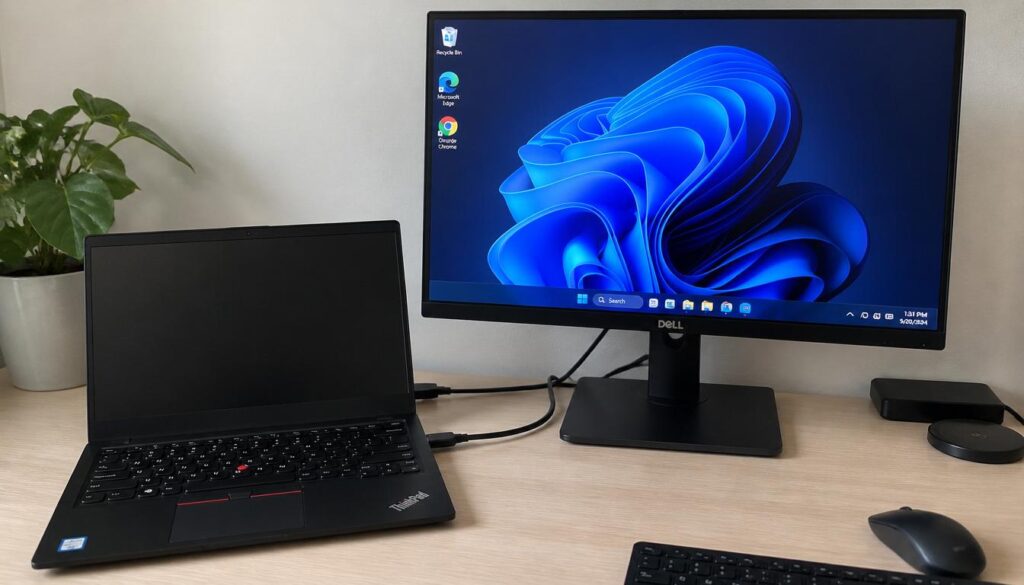
This diagnostic result means your GPU is healthy. The fault is isolated to the internal display path. Here’s how to work through it.
How to Fix Lenovo Laptop Screen Problems?
Step 1: Check Display Mode with Windows + P
Press Windows + P and cycle through the four display options. Select PC screen only and observe. If the laptop screen comes on, Windows was simply set to external-only mode possibly an accidental keypress or a setting change from a docking station.
Connectivity issues sometimes go hand-in-hand with display problems, especially when using a docking station or HDMI adapter that also handles network passthrough. If you plug in an external monitor and notice that your internet connection drops or becomes unstable at the same time, that is a separate issue worth addressing. Our guide on fixing WiFi connection problems covers 10 tested fixes that work on Windows 11 laptops including Lenovo models.
Step 2: Use the Lenovo Novo Button
The Lenovo Novo button is a small pinhole button found on select IdeaPad models usually near the power button or on the left edge. With the laptop powered off, press it with a straightened paperclip to open the Novo button menu.
If the internal screen shows the Novo button menu but goes blank once Windows loads, the fault is software or driver the LCD panel and cable are physically functional.
If the internal screen shows nothing even at the Novo button menu stage, the display cable or LCD panel has a physical fault.
Step 3: Inspect or Replace the Display Cable
The display cable on most Lenovo IdeaPad and ThinkPad models runs from the motherboard, through the hinge barrel, and connects to the back of the LCD panel. After 12–18 months of repeated open-close cycles, this cable fatigues.
On ThinkPad models, the maintenance manual (available free on Lenovo’s support site) shows the exact cable routing and replacement procedure. On IdeaPad models, the cable is more embedded a technician is recommended unless you have prior disassembly experience.
The cable itself is typically a $3 to $ 5 part depending on the model.
Section 6: Black Lines on Laptop Screen Lenovo Diagnosis and Fix
Black lines on laptop screen Lenovo users see are commonly misdiagnosed. The treatment depends entirely on whether they’re rendering errors or physical panel damage.
Horizontal Black Lines Run the BIOS Test First
Restart and enter BIOS with F2. If the horizontal lines appear in BIOS over a plain-colour background, the LCD panel has a failed row of pixels hardware damage. Driver fixes won’t help.
If horizontal lines only appear in Windows not in BIOS do the full graphics driver refresh from Section 3, Fix 3. Rendering errors caused by corrupt driver files produce exactly this pattern.
Can a Graphic Driver Update Fix Black Lines?
Yes but only for lines caused by rendering errors, not physical panel damage. Lines that shift position when you change resolution or refresh rate respond to driver fixes. Lines that are perfectly static, visible over every colour, and appear even over a solid white background in Notepad or Paint are physical LCD damage and require panel replacement.
Vertical Black Lines Almost Always Hardware
A solid vertical black line running the full height of the screen at a fixed position is almost universally a dead column of pixels in the LCD matrix. Connect an external monitor. If the external display is clean and the internal has the vertical line, the panel needs replacing. No software fix resolves this.
Section 7: White Spot on Lenovo Laptop Screen Full Explanation
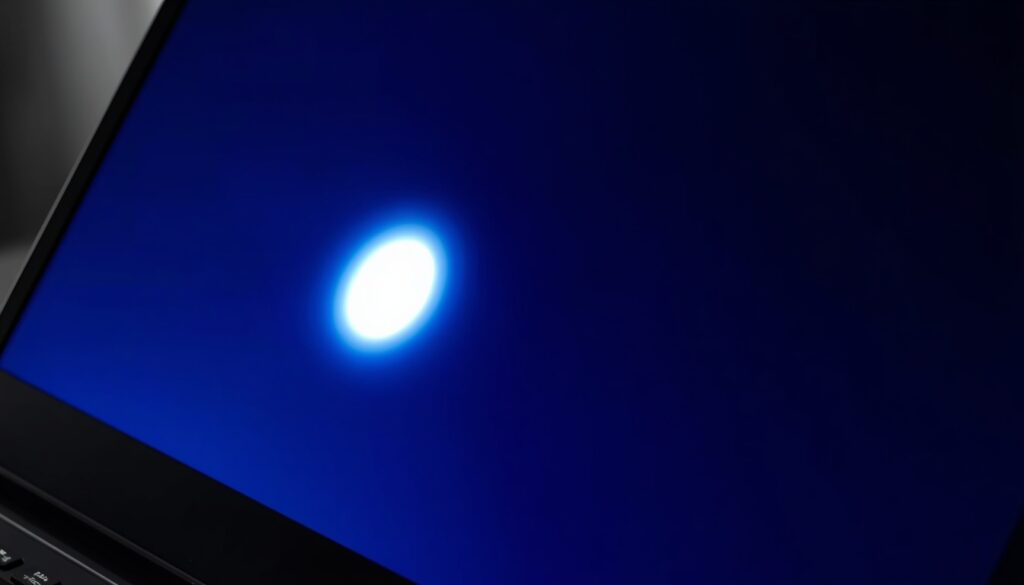
A white spot on Lenovo laptop screen is one of the few display problems that is almost never software. Here’s the full picture.
What Causes It
The white spot is caused by damage to the optical diffuser layer the thin plastic film behind the LCD panel that spreads backlight evenly. When this layer gets dented, compressed, or physically separated, light from the backlight bleeds through at that point creating a bright hotspot.
- A pen or cable trapped between keyboard and lid when the laptop was closed
- Pressure from a tight-fitting laptop bag
- A manufacturing defect in the backlight assembly documented in certain IdeaPad 3 and 5 batch runs
- A minor impact that looks harmless on the surface but stresses the panel internally
Can You Fix a White Spot at Home?
Rarely. Some users have reported temporary improvement by applying very gentle, even pressure over the spot with a soft cloth while the laptop is warm the heat can occasionally reseat a slightly lifted diffuser film. The success rate is low, and applying too much pressure makes it worse.
If the white spot appeared without any impact you caused, photograph it and contact Lenovo support. Certain IdeaPad production batches have had manufacturing defect claims accepted for exactly this issue.
Out of warranty, the fix is LCD panel replacement. The panel cost for a 15.6-inch Full HD IdeaPad screen runs roughly $30 to $50 depending on resolution and supplier.
Section 8: Lenovo Laptop Won’t Turn On vs. Screen Won’t Display Know the Difference
A large number of people searching how to fix Lenovo laptop screen problems are actually dealing with a power fault, not a screen fault. Here’s how to tell them apart in 60 seconds.
Signs the Laptop Is On But the Screen Is Dead
- Fan spins at startup
- Keyboard backlight or Caps Lock LED responds
- External monitor shows the desktop when connected via HDMI
- You hear Windows startup sounds or a boot chime
If any of these are true, go back to Section 3 this is a screen or driver problem, not a power problem.
Signs the Laptop Is Not Powering On at All
- No fan spin, no LEDs, complete silence when pressing power
- Battery LED flashes in a pattern (check Lenovo’s LED error code list for your specific model)
- Nothing appears on an external monitor either
- Charger LED goes out when connected possible short circuit
If your Lenovo laptop won’t turn on at all, the problem is with the battery, charging circuit, or motherboard. For ThinkPads, try a hard reset first: hold the power button for 30 full seconds with the charger disconnected and any removable battery removed. Then reconnect and try again.
Section 9: Model-Specific Tips — ThinkPad, IdeaPad, Yoga, Legion
ThinkPad
ThinkPads have the most accessible built-in diagnostics of any Lenovo line. Hold Fn + F10 on startup to launch Lenovo Diagnostics it includes a dedicated LCD test that checks pixel rows, backlighting, and colour gradients without booting into Windows. Run this before assuming any hardware fault.
ThinkPad service manuals are publicly available on Lenovo’s support site for every model ever released. These include torque specs, cable routing diagrams, and part numbers. Repairs are designed to be serviceable.
IdeaPad
The IdeaPad 3 and 5 series (particularly 2021–2023 production) have a documented pattern of display cable loosening at the left hinge after 12–18 months. If you see hinge-dependent flickering worse at certain angles, better when fully open the cable is almost certainly the cause.
IdeaPad plastic bezels use clips rather than screws, making them more fragile during disassembly. A local technician is worth the $10–$20 labor charge to avoid cracking the bezel.
Yoga
The 360-degree hinge mechanism is the most demanding configuration for a display cable. Yoga users who regularly use tent mode or tablet mode see cable fatigue faster than standard hinge laptops. The graphics driver refresh from Section 3 still applies for software issues, but expect hardware cable problems to arise earlier in this form factor.
Legion
Legion models run variable refresh rate displays at 144Hz, 165Hz, or 240Hz. After a Windows Update, these settings frequently get reset to 60Hz and the mismatch causes screen tearing and a low-grade flicker that feels like hardware but isn’t.
Go to Display Settings > Advanced Display and manually set the correct Hz value for your panel. Also check Legion Space for any refresh rate overrides. GPU temperature checks are more relevant here Legion laptops running heavy workloads without adequate ventilation develop display instability from thermal throttling.
Legion gaming laptops often share connectivity issues with other high-performance setups especially when using external monitors, HDMI switches, or gaming routers. If your Legion’s WiFi drops during gaming sessions or under heavy GPU load, that is a known thermal and driver interaction issue. Our Xbox WiFi fix guide covers the same router-side and device-side fixes that apply equally well to Legion laptops connected to gaming networks.
Section 10: LCD Screen Replacement When It is Time and How to Do It Right
If you have worked through Sections 3 through 8 and the problem persists, or your diagnostic tests confirmed physical LCD damage, replacement is the path forward.
How to Find the Right Replacement Panel
The exact screen part number is printed on a sticker on the back of the LCD panel. Use your Lenovo model number on panelook.com or laptopscreen.com to find compatible panels.
Always match: screen size in inches, native resolution, connector type (30-pin or 40-pin eDP), and backlight type. Even within the same laptop model, Lenovo sources panels from multiple suppliers (BOE, AUO, LG, Innolux) — the connector position sometimes differs between them.
Cost Estimate (June 2025)
- 15.6-inch FHD IdeaPad replacement panel: PKR $30 – $60
- 14-inch FHD ThinkPad panel: $40 – $80
- Yoga OLED panel: $90 – $180+
- Labor charge at a local technician: $10 – $20
- Display cable only: PKR $3 – $8
DIY vs. Technician
ThinkPads are designed for serviceability iFixit and Lenovo’s own service manuals give you step-by-step guides. If you’ve disassembled electronics before, a ThinkPad panel swap is very achievable.
IdeaPad, Yoga, and Legion models are less forgiving. The bezel clips break easily and the panel is often glued in newer slim designs. Pay the labor cost unless you’ve done this before.
Related Guides on SmartTechFixer (Cluster Articles)
- Lenovo laptop display issues — Full symptom-to-fix diagnostic tree for every display problem type
- White spot on Lenovo laptop screen — Warranty claim process and diffuser repair options
- Black lines on laptop screen Lenovo — How to distinguish panel damage from driver errors
- Lenovo laptop display problem after Windows update — Rollback, driver reinstall, and prevention
- Lenovo laptop won’t turn on — Separating power faults from screen faults step by step
FAQ: How to Fix Lenovo Laptop Screen Problems
Why is my Lenovo laptop screen flickering?
The most common cause is an outdated or corrupted graphics driver, followed by an incorrect refresh rate in Display Settings. Run Fix 1 (Win+Shift+Ctrl+B), then do a graphics driver refresh if that doesn’t hold. If the flickering gets worse when you move the screen lid, the display cable is physically failing at the hinge that is a hardware fix.
How do I know if my Lenovo screen issue is hardware or software?
Run the BIOS test: press F2 on startup and watch the BIOS screen for a minute. Problem in BIOS = hardware. Problem only in Windows = software. Then run the external monitor test: connect HDMI to a TV. External fine and internal broken = internal display path fault. Both broken = deeper system issue.
How do I fix the black screen of death on my Lenovo laptop?
Start with Win+Shift+Ctrl+B (Fix 1). If the screen doesn’t recover, do a hard reset: hold the power button 30 seconds, disconnect power, wait, reconnect and restart. If still black, boot into Safe Mode if Safe Mode shows the screen, do a full graphics driver refresh. If nothing works and the screen is black even in BIOS, connect an external monitor to confirm the laptop is running, then diagnose the display cable or LCD panel.
Why does my Lenovo IdeaPad screen flicker when I move the lid?
This is almost certainly a fatigued display cable at the hinge a documented issue on IdeaPad 3 and 5 series models from 2021–2023. The cable that connects the screen to the motherboard runs through the hinge and cracks internally after thousands of open-close cycles. If the laptop is under warranty, claim it. If not, a cable replacement is inexpensive.
What is the Lenovo Novo button and how does it help?
The Novo button is a small pinhole button on select IdeaPad models. It opens a boot menu for BIOS access and system recovery without needing Windows to load. If the internal screen shows the Novo menu but goes blank in Windows, the hardware is physically fine and the problem is software.
Can I use an external monitor while my Lenovo screen is broken?
Absolutely. Connect via HDMI, USB-C to HDMI, or DisplayPort. Press Windows + P and select “Second screen only.” You can use the laptop fully normally this way while arranging a repair all your data is accessible, nothing changes.
Does a white spot on a Lenovo laptop screen mean I need a new screen?
In most cases, yes. A white spot is damage to the optical diffuser layer behind the LCD panel it is a physical defect, not software. Some users have temporary success applying gentle warmth and pressure to reseat the diffuser film, but the success rate is low. If the spot appeared without any impact, photograph it and contact Lenovo support certain batch manufacturing defects have been accepted as warranty claims in some regions.
Black screen situations on Lenovo laptops are sometimes caused by the same DNS and network driver conflicts that affect internet connectivity after a Windows Update. If your black screen appeared right after a Windows Update and your internet also stopped working at the same time, those two problems share the same root cause. Our guide on How to Fix DNS Server Not Responding on Windows 11 walks through the exact update rollback and network driver reset steps that resolve both issues together.
Master Checklist: How to Fix Lenovo Laptop Screen Problems Step by Step
Use this as your final reference before calling a technician or ordering parts:
- Win+Shift+Ctrl+B shortcut — 10-second display driver restart. Try this first.
- Brightness key check — Fn + brightness-up. Six to eight presses.
- Hard reset — Power button held 30 seconds, disconnected from power.
- External monitor test — HDMI to TV. Determines hardware vs. software split.
- BIOS screen test — F2 on boot. Confirms if hardware or software is the fault.
- Safe Mode test — Screen working in Safe Mode = driver conflict in Windows.
- Graphics driver refresh — Uninstall both display adapter and monitor driver, reinstall fresh.
- Display adapter settings fix — Correct refresh rate and resolution in Display Settings.
- Windows Update rollback — If problem appeared right after an update.
- Remove conflicting apps — Sorted by install date, remove what’s new.
- Physical inspection — White spots, hinge-flex flickering, static black lines.
- LCD screen replacement — Only after all software tests fail and hardware fault is confirmed.

How to Fix Lenovo Laptop Screen Problems?
The overwhelming majority of Lenovo laptop screen problems are resolved by Step 7. If you are still stuck after working through all 12 steps, you have a confirmed hardware fault and at that point you have the exact diagnostic information a repair technician needs to fix it efficiently on the first visit, without guessing.