How to Check CPU Temp Windows 11
Is your PC suddenly lagging during gaming, getting unusually hot, or sounding like a jet engine? If your computer slows down, crashes randomly, or FPS drops while gaming, overheating could be the hidden problem. Learning how to check cpu temp windows 11 can help you catch overheating before it damages performance or hardware.
The good news? You don’t need to be a tech expert to monitor your processor temperature. In this guide, I’ll show you the easiest and safest ways to check your CPU temperature using trusted tools and built-in options in Windows 11.
By the end, you’ll know exactly whether your CPU is running cool—or dangerously hot.

Why You Should Monitor CPU Temperature in Windows 11
Before learning how to check cpu temp windows 11, it’s important to understand why CPU temperatures matter.
When your processor gets too hot, your PC can start showing warning signs like:
- Slow performance during gaming or multitasking
- Sudden FPS drops
- Random shutdowns or blue screen errors
- Loud cooling fans running constantly
- Laptop or desktop feeling unusually hot
A healthy CPU temperature keeps your system stable, faster, and protected from long-term damage.
Normal vs High CPU Temperatures
Here’s a quick overview of what CPU temperatures usually look like.
| Usage Condition | Normal Temperature | Warning Temperature |
|---|---|---|
| Idle (No Heavy Apps Running) | 30°C to 45°C | Above 55°C |
| Normal Daily Use | 45°C to 65°C | Above 75°C |
| Heavy Gaming or Video Editing | 65°C to 85°C | Above 90°C |
| Overheating Zone | 90°C+ | Critical Temperature |
Important: CPU temperature can vary depending on your processor model, cooling system, room temperature, and laptop or desktop design.
Method 1: Check CPU Temp in Windows 11 Using Core Temp
One of the easiest ways to learn how to check cpu temp windows 11 is by using a lightweight tool called Core Temp.
Core Temp is a trusted free program that shows your CPU temperature in real time without slowing down your system.
The safest place to download it is the official website: alcpu.com
Why Core Temp Is a Good Choice
Core Temp is popular because it:
- Shows real-time CPU temperature
- Displays temperature for each processor core
- Uses very little system resources
- Works perfectly with Windows 11
- Helps gamers and power users monitor overheating
Step-by-Step: How to Use Core Temp
Follow these simple steps:
Step 1: Download Core Temp
Visit the official website and download the latest version of Core Temp from alcpu.com.
Avoid downloading from random websites to reduce security risks.
Step 2: Install the Application
After downloading:
- Open the setup file
- Click Next through installation
- Uncheck any optional bundled software if shown
- Finish installation
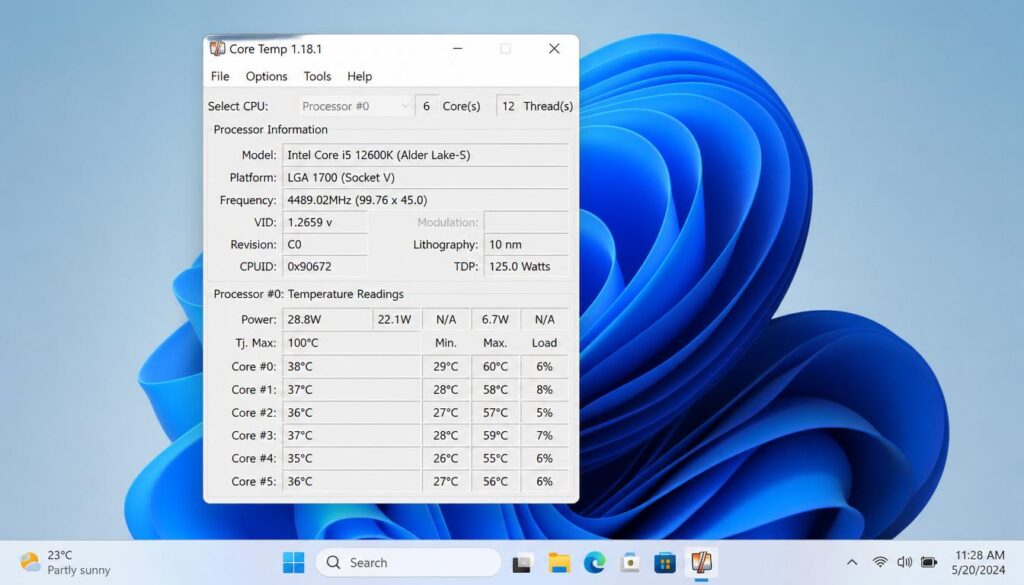
Step 3: Launch Core Temp
Open the application after installation.
You’ll instantly see:
- Current CPU temperature
- Minimum temperature
- Maximum temperature
- Temperature of each CPU core
The program updates in real time, making it one of the easiest tools for how to check cpu temp windows 11.
Step 4: Monitor Temperature During Gaming
Want accurate results?
Keep Core Temp running while:
- Playing games
- Editing videos
- Streaming
- Running heavy software
This helps you see how hot your processor gets under pressure.
Method 2: Check CPU Temperature Without Software (BIOS/UEFI)
If you prefer not to install apps, there’s another way to learn how to check cpu temp windows 11 without software.
You can check CPU temperature directly from the BIOS or UEFI firmware.
This method is useful because it shows hardware information before Windows loads.
How to Access BIOS/UEFI in Windows 11
Here’s the easiest method:
Step 1: Open Settings
Press:
Windows + I
Then go to:
System → Recovery
Step 2: Open Advanced Startup
Under Recovery Options, click:
Restart Now
Your PC will reboot into advanced recovery mode.
Step 3: Navigate to UEFI Firmware Settings
Follow this path:
Troubleshoot → Advanced Options → UEFI Firmware Settings → Restart
Your PC will restart again and open BIOS/UEFI.
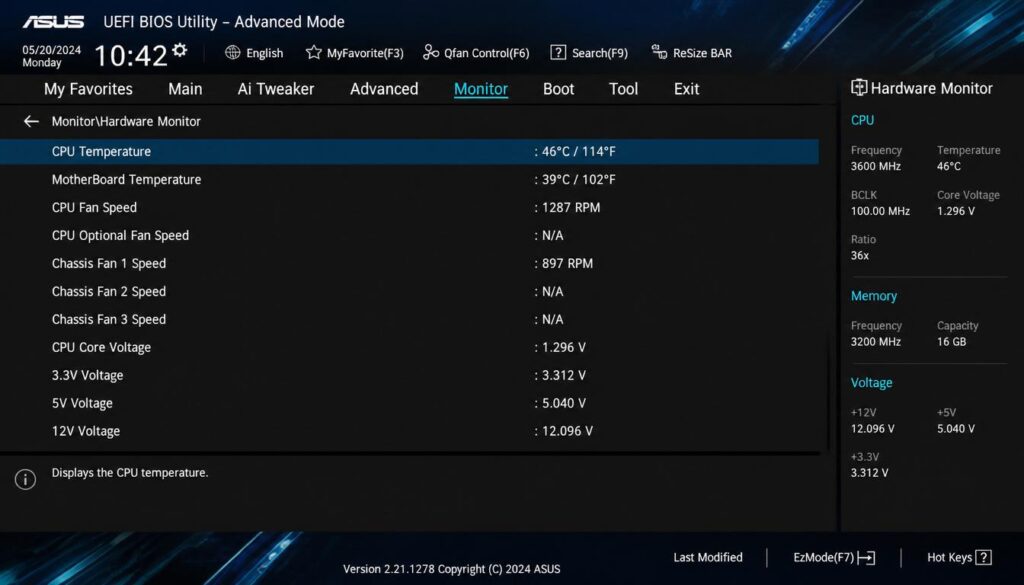
Step 4: Find CPU Temperature
Look for sections like:
- Hardware Monitor
- PC Health Status
- Monitor
- CPU Information
The exact menu depends on your motherboard brand.
This built-in method works well if you want how to check cpu temp windows 11 without installing extra software.
Note: CPU temperature inside BIOS may look slightly lower because Windows programs and games are not running.
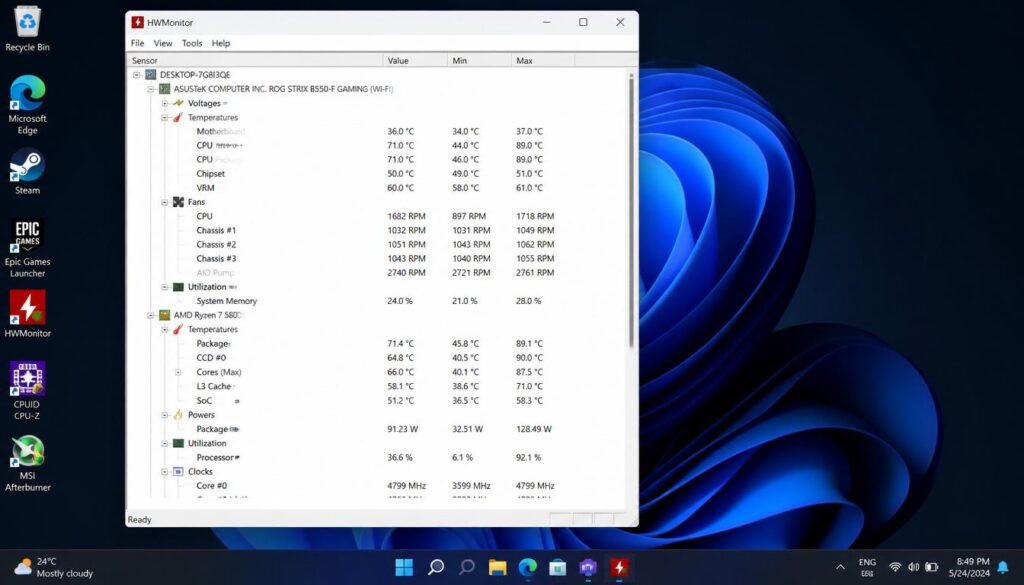
Method 3: Use HWMonitor for Advanced System Logging
If you’re a gamer, streamer, or PC enthusiast, HWMonitor is another powerful option.
It goes beyond basic temperature monitoring and tracks:
- CPU temperature
- GPU temperature
- Fan speeds
- Voltage readings
- Maximum and minimum temperature logs
This makes it ideal for advanced users learning how to check cpu temp windows 11 more professionally.
Why Gamers Prefer HWMonitor
HWMonitor is especially useful because it records:
- Minimum temperature (lowest temp reached)
- Maximum temperature (highest heat during gaming)
- Live temperature changes
For example, if your PC crashes during gaming, HWMonitor helps identify whether overheating caused the issue.
How to Use HWMonitor
- Download and install HWMonitor
- Open the application
- Expand the CPU section
- Watch live temperatures and max values
Run a demanding game for 15–20 minutes to see realistic temperature results.
Many users searching for how to check cpu temp windows 11 prefer HWMonitor because of its detailed logging features.
Signs Your CPU Temperature Is Too High
Not sure if your CPU is overheating?
Watch for these common symptoms:
- Constant loud fan noise
- FPS drops while gaming
- Unexpected shutdowns
- Stuttering performance
- Random freezes
- PC case becoming extremely hot
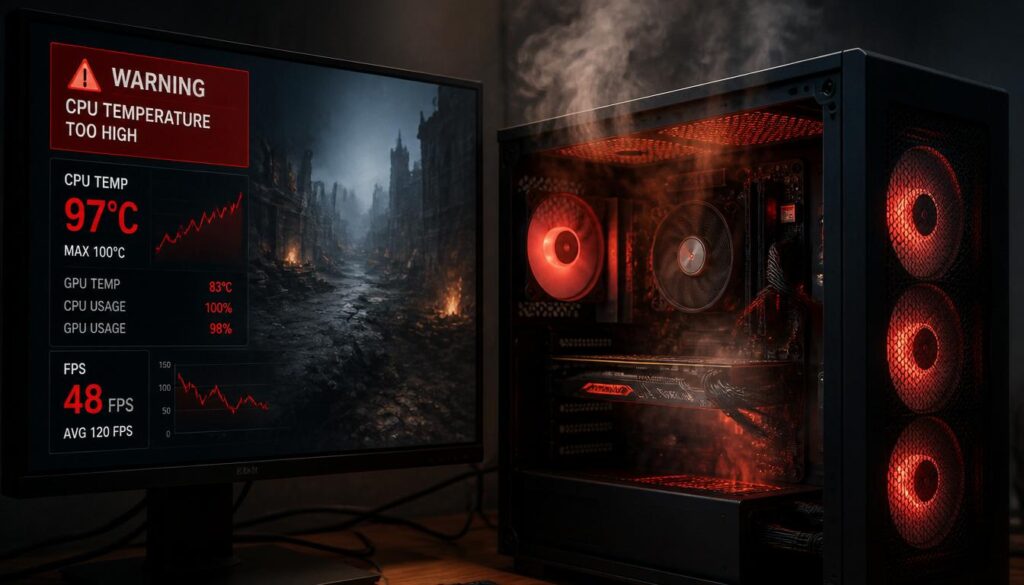
If temperatures stay above 90°C, your CPU may start thermal throttling to prevent damage.
Practical Tips to Reduce High CPU Temperature
After learning how to check cpu temp windows 11, the next step is reducing high temperatures.
Here are some practical fixes that actually work.
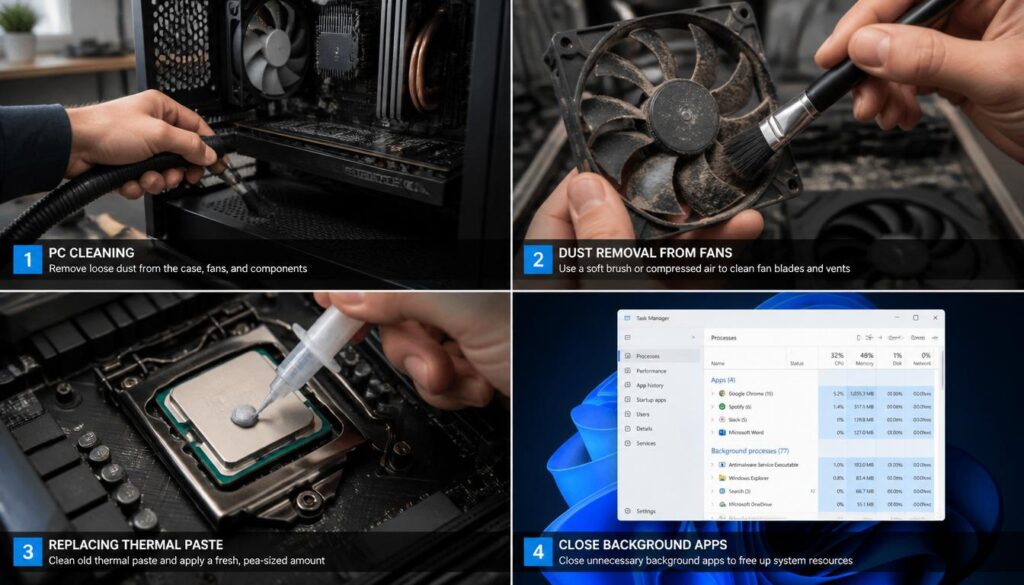
1. Close Background Bloatware
Too many apps running at once can increase CPU usage.
Press:
Ctrl + Shift + Esc
Open Task Manager and close unnecessary background applications.
This instantly lowers CPU load.
2. Clean Dust from Fans and Air Vents
Dust blocks airflow and traps heat.
If you haven’t cleaned your PC in months:
- Remove dust from cooling fans
- Clean air vents
- Check CPU cooler airflow
Even a small dust buildup can increase temperatures significantly.
3. Replace Old Thermal Paste
Thermal paste sits between the CPU and cooler.
Over time, it dries out and becomes less effective.
Replacing old thermal paste can lower CPU temperature by several degrees, especially on older systems.
4. Improve Airflow
Better airflow equals better cooling.
Try these upgrades:
- Add extra case fans
- Keep cables organized
- Improve ventilation around your PC
5. Use a Cooling Pad (For Laptops)
Laptop users can reduce heat by using a cooling pad for better airflow underneath the system.
Frequently Asked Questions
What Is a Safe CPU Temperature in Windows 11?
For most systems:
- 30°C to 45°C = idle
- 45°C to 65°C = normal usage
- 65°C to 85°C = gaming or heavy tasks
- 90°C+ = overheating risk
Does Windows 11 Have a Built-In CPU Temperature Monitor?
No, Windows 11 does not show CPU temperature directly inside Task Manager.
You’ll need tools like Core Temp or HWMonitor, or check temperatures through BIOS/UEFI.
Can High CPU Temperature Damage My Computer?
Yes. Long-term overheating can reduce CPU lifespan, lower performance, and even cause random shutdowns.
That’s why understanding how to check cpu temp windows 11 is important for every PC user.
Final Thoughts
Knowing how to check cpu temp windows 11 is one of the smartest things you can do to keep your PC healthy and performing at its best.
For most users, Core Temp is the easiest and safest option because it’s lightweight and beginner-friendly. If you prefer a built-in method, BIOS/UEFI works without extra software. And if you’re a gamer or power user, HWMonitor gives advanced tracking with max and minimum temperature logs.
The key is simple: monitor temperatures regularly and fix overheating early before it becomes a serious problem.
A cooler CPU means better performance, smoother gaming, and a longer-lasting PC.
If you wants to need any more help you can visit our website and also take help to related windows 11 problems to make fast your laptop or PC fast.