Your WiFi extender is sitting in its box, the WiFi signal in your bedroom is one bar away from useless, and every guide you have opened so far tells you to place it halfway without explaining what that actually means for your house. This guide fixes that gap. Below, you will learn exactly how to set up WiFi extender hardware using every available method, the real math behind placement, and the specific failure points that most manufacturer guides skip entirely, including IP login problems, WPS pairing failures, and SSID cloning conflicts that quietly wreck a fresh setup.
Quick Answer: How To Set Up A WiFi Extender
Plug the extender into an outlet near your router, then either press the WPS button on both devices within two minutes of each other, or connect to the extender default network and log in through its setup IP address, such as 192.168.1.1 or 192.168.1.250, to enter your WiFi password manually. Once connected, move the extender to a spot roughly halfway between your router and the dead zone, keeping it within direct line of sight of the router. Confirm the link by checking for a solid status light before relocating.
Setup Methods Compared
| Method | Difficulty | Setup Speed | Reliability | Best For |
|---|---|---|---|---|
| WPS Button Method | Very easy | Under 5 minutes | High, if both devices support WPS | Newer routers and extenders with a physical WPS button |
| Web Browser Setup Method | Moderate | 10 to 15 minutes | Highest, since every setting is manual | Older routers, hidden networks, or extenders without WPS |
| Mobile App Setup Method | Easy | 5 to 10 minutes | High | Brand specific extenders such as Tapo, Nighthawk, or Deco with dedicated apps |
How To Set Up WiFi Extender
The WPS button method wins on raw speed, but the web browser method gives you the most control and tends to succeed where WPS quietly fails. If you own an extender from a manufacturer with its own app, that app usually walks you through the process with the fewest support calls.
Whether you search for this task as WiFi repeater setup, setting up a repeater WiFi, or setting up wireless extender hardware, the underlying process is identical. How to use a WiFi extender, how to connect WiFi extender to router, how to install WiFi repeater, how to install WiFi extender, setup WiFi range extender, how to connect WiFi extender, how to pair WiFi extender, and how to use WiFi repeater are all different phrasings of the same two setup paths covered in detail below.
Where To Place The Extender Before You Even Plug It In
Every major manufacturer repeats the same advice, place the extender halfway between the router and the dead zone. That advice is only half correct, because distance alone does not account for walls, floors, or interference.
Here is the more accurate version of the rule. Your extender needs to sit at a point where it still receives at least 50 percent signal strength from the router, measured on your phone as roughly three out of five WiFi bars. If that point happens to be less than halfway to the dead zone because of a wall or floor in between, place it there instead of forcing the exact midpoint.
A few placement principles that most competitor guides leave out entirely:
- Concrete and brick walls cut 2.4 GHz signal by roughly 10 to 15 decibels per wall.
which translates to a 70 to 90 percent reduction in usable signal for each barrier the signal has to pass through. If your dead zone is on a different floor or behind a concrete wall, the halfway point on a tape measure is not the halfway point in real signal terms. - Metal objects, mirrors, and large appliances scatter and absorb signal.
Avoid placing the extender behind a television, inside a metal cabinet, or directly beside a refrigerator. - Height matters more than most people expect.
A WiFi extender placed 1.2 to 1.5 meters off the ground, roughly waist height on a shelf or high outlet, radiates its signal more evenly than one plugged into a floor level socket behind furniture. - Line of sight beats raw distance.
An extender ten meters away with a clear path to the router often performs better than one five meters away with two walls in between.
How To Set Up WiFi Extender
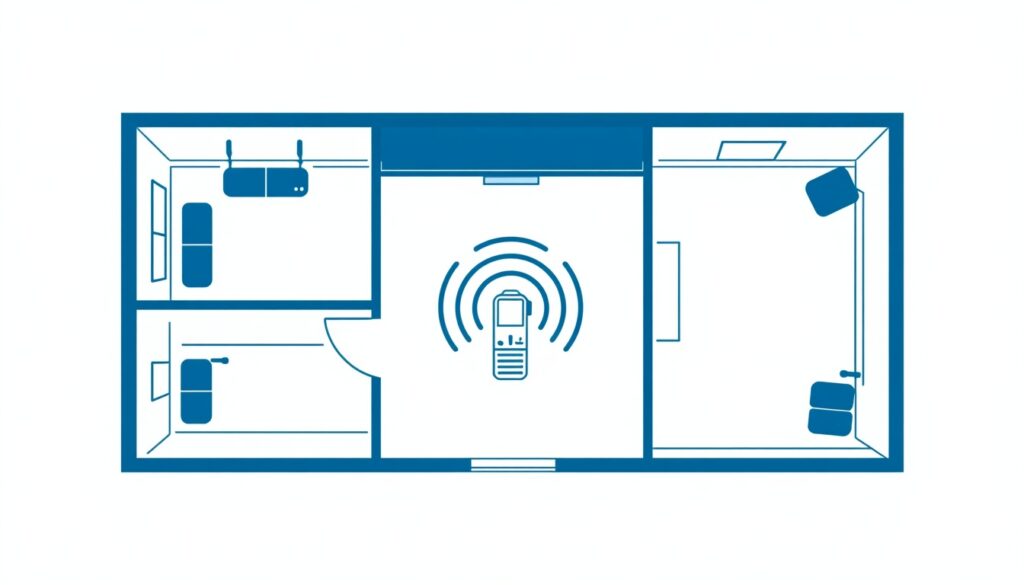
Walk the target area with your phone’s WiFi signal indicator visible before you commit to a final outlet. If the signal in the dead zone still shows fewer than two bars after moving the extender, the extender is not the problem, the router’s reach is, and you may need a second extender or a different placement for the router itself.
An extender fixes weak signal, but it cannot fix a router that has lost its connection to the internet entirely. If your extender shows a solid light yet nothing loads, work through our guide on WiFi connected but no internet access before assuming the extender is faulty.
How To Set Up WiFi Extender Using WPS (Fastest Method)
WiFi Protected Setup, known as WPS, is the quickest way to pair almost any modern extender with almost any modern router, and it does not require you to type or even know your WiFi password.
- Plug the extender into an outlet near the router.
Setup always starts close to the router, even if the extender will eventually move somewhere else. Wait for the power light to turn solid. - Press the WPS button on the router first.
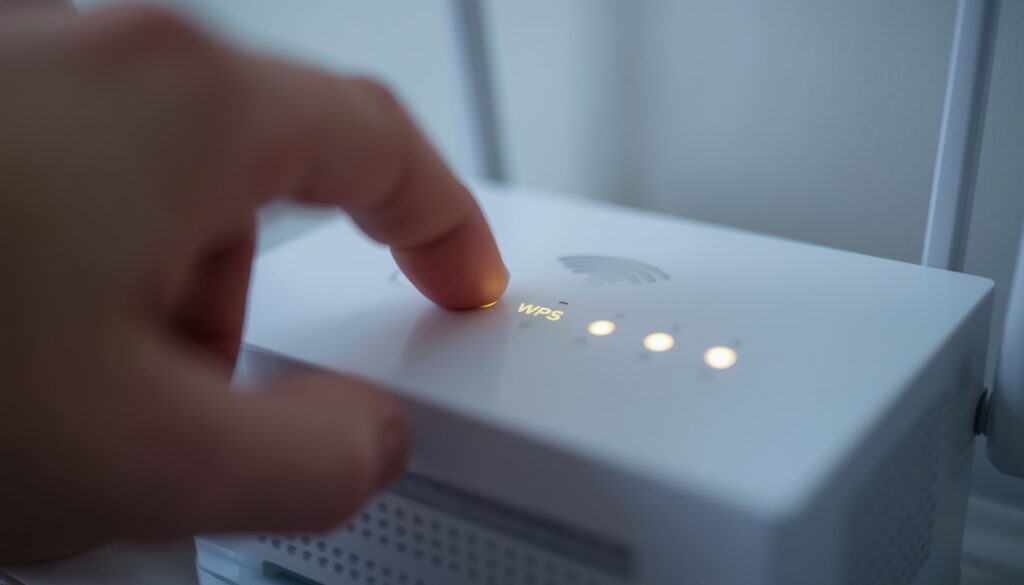
Most routers require you to hold the button for two to three seconds until an indicator light starts blinking. - Press the WPS button on the extender within two minutes.
The pairing window is short and strict. If you press the extender’s button too early or too late, the handshake will fail and you will need to start the two button presses again. - Wait for the connection light to turn solid.
This usually takes anywhere from thirty seconds to two full minutes. A blinking amber or red light generally means the pairing failed, while a solid green, blue, or white light confirms success. - Unplug the extender and move it to its final placement.
Give it sixty seconds to reboot and reconnect at the new location before testing the signal again.
If your extender connects but devices still refuse to authenticate properly, the problem is often a security protocol mismatch rather than the extender itself. Our guide on authentication issue WiFi covers the same WPA and WPA2 conflicts that show up during extender setup.
Why WPS Pairing Fails And How To Fix It
WPS setup fails far more often than manufacturer guides admit, and almost none of the popular guides explain why. Here are the actual causes, in order of how frequently they occur.
Timing mismatch between the two button presses.
The two minute window is unforgiving. If you get distracted between pressing the router’s button and the extender’s button, the session simply times out. The fix is to press the router’s button, immediately walk to the extender, and press its button without pausing for anything else.
WPS is disabled on the router for security reasons.
Some routers supplied by internet providers ship with WPS turned off by default, since WPS has known security weaknesses that make it a target for brute force PIN attacks. Log into the router’s admin panel and look under Wireless or Security settings for a WPS toggle. If it is missing entirely, the router does not support WPS setup at all, and you will need the web browser method instead.
The router and extender are on different frequency bands.
Dual band and tri band routers sometimes require you to specify which band, 2.4 GHz or 5 GHz, should handle the WPS handshake. If your extender only supports 2.4 GHz WPS and your router’s WPS button defaults to 5 GHz, the pairing will silently fail every time. Check the extender’s manual for its supported WPS band before trying again.
Too many devices already connected to the router’s WPS session limit.
A small number of budget routers cap how many WPS sessions can run per hour. If you have already used WPS to pair a printer or smart speaker recently, wait about ten minutes before trying the extender.
How To Set Up WiFi Extender Using The Web Portal (No WPS Button)
If WPS is unavailable, disabled, or simply not working, the web browser method gives you full manual control and tends to be the most reliable setup path overall.
- Plug in the extender and wait for the power light.
Give it a full minute to boot before continuing. - Connect a phone or laptop to the extender’s default WiFi network.
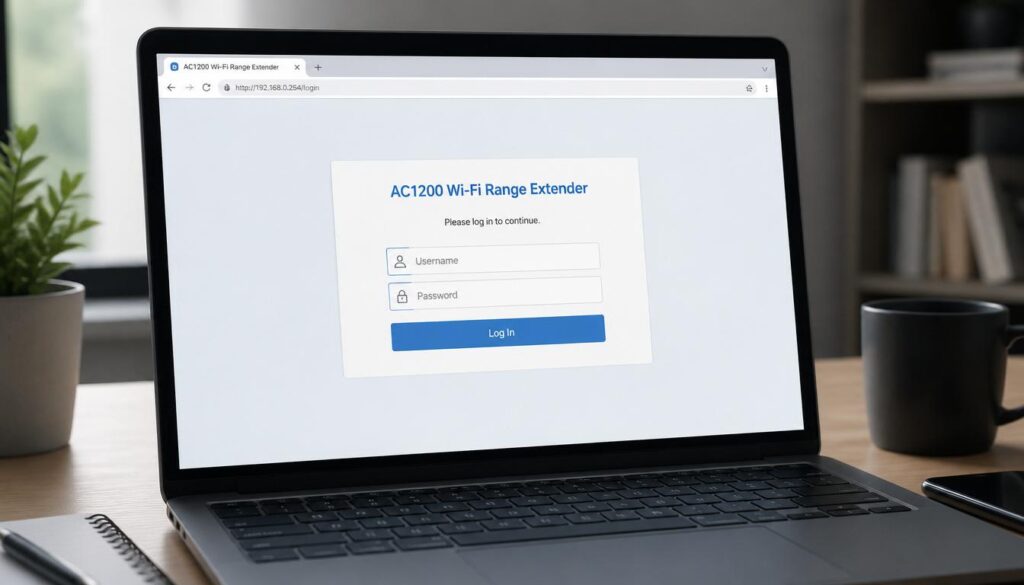
This network name is usually printed on a label on the device itself, often something like the brand name followed by “_EXT” or “_Setup.” No password is normally required for this initial connection. - Open a browser and enter the extender’s setup IP address.
Most extenders default to one of a small handful of addresses: 192.168.1.1, 192.168.1.250, 192.168.0.1, or a branded local address such as tplinkextender.net or mywifiext.net. Check the sticker on the device or the printed manual for the exact one that applies to your unit, since guessing wrong will simply load a blank page or a different device’s login screen. - Log in with the default administrator credentials.
These are separate from your WiFi password. Most extenders default to a username of “admin” with either a blank password or “admin” as the password, unless the label on the device specifies otherwise. - Select your existing WiFi network from the scan list.
The extender will search for nearby networks and list your router’s SSID alongside neighboring ones. Choose the correct one carefully, especially if you live in an apartment building with several networks visible. - Enter your WiFi password and choose a security protocol.
Match whatever your router already uses, typically WPA2 or the newer WPA3. Mismatched protocols are one of the most common reasons an extender connects during setup but drops the connection later. - Save the settings and wait for the extender to reboot.
This step can take two to three minutes. Do not unplug the extender during this window, since an interrupted save can corrupt the configuration and force a factory reset. - Reconnect your setup device to your normal WiFi network.
Then move the extender to its final placement using the guidance above.
Once your extended network is stable, it is worth understanding how it affects your data usage on mobile devices that switch between WiFi and cellular. See our breakdown of does using WiFi use data for a closer look at how your phone handles weak signal handoffs.
Fixing SSID Cloning And Roaming Conflicts After Setup
This is the single most overlooked problem across every competitor article on this topic. Once your extender is running, it either creates its own separate network name or clones your router’s existing SSID to create one seamless network. Both approaches cause specific, predictable problems.
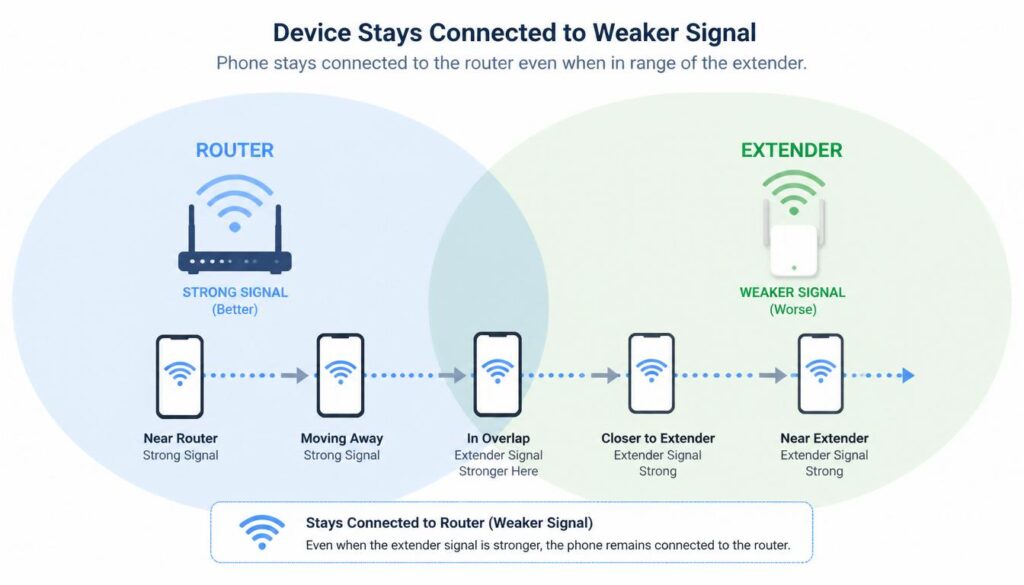
If the extender clones your router’s SSID exactly (same network name and password on both), your devices are supposed to roam automatically between the two, connecting to whichever one is strongest. In practice, many phones and laptops suffer from what is called sticky client behavior: the device latches onto the router even after walking into the extender’s zone, because it does not actively scan again for a stronger signal once already connected. The result is a phone that shows full WiFi bars from across the house yet loads pages painfully slowly, because it is still technically connected to the weaker, farther signal.
To fix sticky client behavior, do one of the following:
- Turn WiFi off and back on manually after moving into the extender’s coverage zone, forcing the device to scan again and reconnect to the stronger signal.
- Enable band steering or fast roaming, sometimes labeled 802.11r or 802.11k, in your router’s advanced wireless settings, if your hardware supports it.
- If sticky clients remain a persistent annoyance, give the extender’s network a slightly different name, such as adding “_EXT” to the end, so you can manually select the stronger connection when needed.
If the extender uses a different SSID than the router.
You avoid sticky client issues entirely, but you now have two separate networks to manage. Devices will not roam automatically between them, and you will need to manually switch networks as you move through the house. This trade off is worth it in homes where automatic roaming has proven unreliable, but most users are better served by matching SSIDs and dealing with occasional sticky client behavior through the fixes above.
How To Set Up WiFi Extender
If you are troubleshooting a phone that keeps dropping the extended network, clearing stale connection data can help. Our guide on clearing cache on Android without deleting apps walks through the safest way to do this without losing saved logins.
Common Configuration Mistakes And How To Fix Them
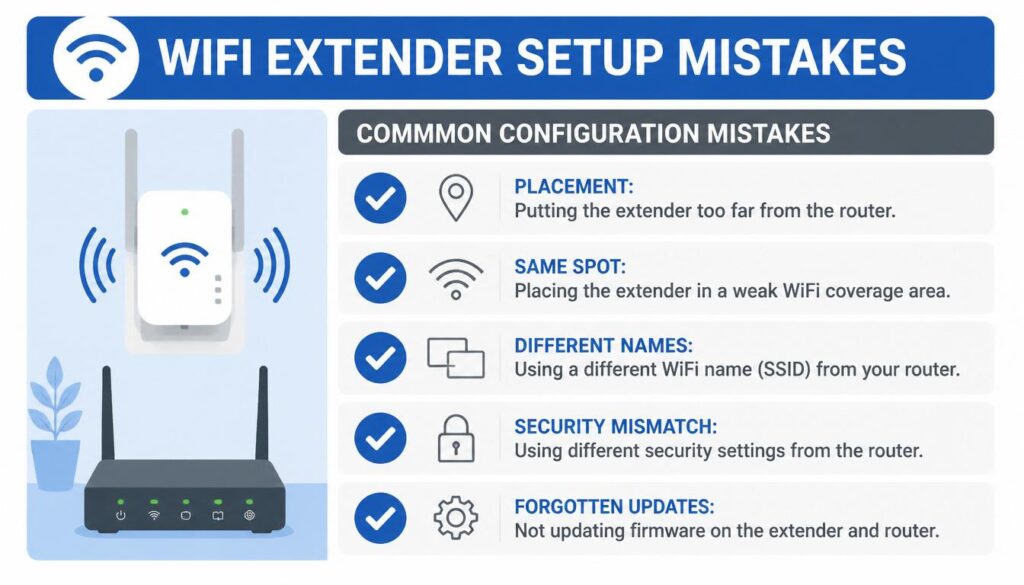
Placing the extender too far from the router during initial setup.
Setup should always begin close to the router, even though the extender’s final home will be farther away. Attempting first time pairing from the eventual dead zone location almost always fails, since there is no signal to receive yet.
Skipping the firmware update after the initial connection succeeds.
Extenders often ship with firmware that is months out of date. Once connected, log into the admin panel or brand app and check for an update before finalizing placement. An outdated extender is more likely to drop connections and mishandle roaming.
Assuming plug and play means zero configuration.
Some extenders do connect automatically the moment you plug them in near an already broadcasting router, particularly mesh compatible units that pair with a matching router brand. Most standalone extenders, however, still need the WPS or web browser steps above. Do you just plug in a WiFi extender and it works? Occasionally, yes, but assuming so without checking the status light wastes far more time than confirming the connection properly the first time.
Using an outdated or mismatched security protocol.
Some extenders default to an older WPA standard for compatibility, which can create a security mismatch with a router running WPA3. If devices connect to the extender but immediately lose internet access, check that both devices are using the same security protocol.
Overloading a single extender with too many devices.
A single extender sharing one radio between receiving from the router and transmitting to your devices can slow down noticeably once more than eight to ten devices connect. If a room has a smart TV, several phones, a laptop, and smart home devices all pulling from the same extender, consider splitting the load with a second extender or upgrading to a dual band model.
Some routers log which devices connect through an extender and how much data each one uses. If you are curious what your provider can actually see once an extender is added to your network, read our explainer on can you see search history on a WiFi bill.
Frequently Asked Questions
How do I connect my WiFi extender to my router?
Plug the extender into an outlet close to the router, then use either the WPS button method or the web browser setup method described above. WPS requires pressing a button on both devices within a two minute window, while the web browser method requires connecting to the extender’s temporary network, logging into its setup IP address, and manually selecting your router’s network and entering your WiFi password.
How to set up a WiFi extender at home?
Start by plugging the extender in near your router rather than in the final dead zone location, complete the pairing through WPS or the web portal, confirm a solid connection light, and then relocate the extender to a point roughly halfway between the router and the weak signal area, adjusting for walls and floors using the 50 percent signal rule covered earlier in this guide.
Do you just plug in a WiFi extender and it works?
Rarely. A small number of mesh compatible extenders paired with a matching router brand can connect automatically, but the vast majority still require either a WPS button pairing sequence or a manual web browser setup before they will extend your existing network. Plugging one in without completing setup usually just creates an unconfigured access point broadcasting its own default network name.
How to set up a TP-Link WiFi extender?
For how to setup tp link wireless range extender models, plug the unit in near the router and either press the WPS buttons on both devices within two minutes, or connect to the extender’s default network, open a browser to tplinkextender.net or 192.168.0.1, and complete the setup wizard by selecting your existing network and entering your password. TP-Link’s Tether app can also handle the entire process for newer models, including OneMesh compatible units that merge the router and extender into a single roaming network.
Final Thoughts
Setting up a WiFi extender is not complicated once you understand the two setup paths and, more importantly, the placement math that most guides skip. Whether you are working through WiFi repeater setup on a decades old router or setting up a WiFi range extender fresh out of the box, the same principles apply: pair close to the router first, confirm the connection before moving anything, and place the final unit where it still receives strong signal rather than at a random measured midpoint. Follow the steps above and most dead zones close within ten minutes, without needing to call support or return the hardware.