If your WiFi feels slow, keeps dropping, or struggles the moment two or three devices connect at once, the real problem is often not your internet plan at all. In most homes the router is simply stuck on a crowded frequency, and every neighboring network is fighting for the same space. Learning how to change Wi Fi channel to fix internet settings on your own router is one of the fastest, completely free fixes available, and it usually takes less than five minutes once you know where to look.
Quick Answer How to Change Wi Fi Channel to Fix Internet
To change your WiFi channel, log in to your router at 192.168.1.1 or 192.168.0.1, open the Wireless or WiFi settings menu, find the Channel field, pick 1, 6, or 11 for 2.4 GHz (or 36 to 48 for 5 GHz), then save and restart. Most routers apply the change within a minute or two.
How to Change Wi Fi Channel to Fix Internet
Why You Should Change Your WiFi Channel
Every router sends and receives data on a specific channel, similar to a lane on a busy road. When several routers nearby broadcast on the same lane, they compete for airtime, and that competition shows up as buffering, laggy video calls, and connections that randomly disconnect.
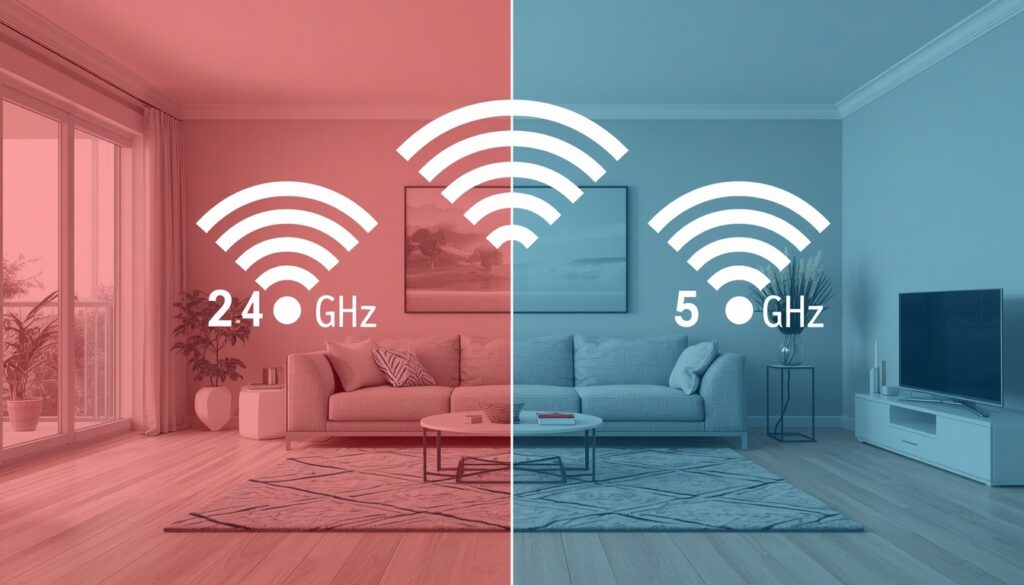
The 2.4 GHz band only has three channels that do not overlap with each other, which are 1, 6, and 11. Because so many routers default to channel 6 out of the box, that particular channel tends to be the most congested one in apartment buildings and dense neighborhoods.
The 5 GHz band is far less crowded. It offers more than twenty separate channels, with 36, 40, 44, and 48 being some of the most commonly used and reliable choices. If your devices support 5 GHz, moving them there often solves congestion problems without touching a single setting on the 2.4 GHz side.
Signs Your Router Is on a Congested Channel
You are likely dealing with channel congestion, not a bad internet plan, if you notice any of these patterns:
- Speeds drop sharply in the evening when more neighbors are online
- Video calls freeze or pixelate even though the internet plan itself is fast
- Devices connect fine but the connection is unstable during gaming or streaming
- A WiFi analyzer app shows five or more networks stacked on the same channel
If several of these sound familiar, it is worth reading our guide on fixing a weak WiFi signal as well, since channel congestion and weak signal often show up together.
How to Find Your Router IP Address
Before you can change anything, you need to log in to the router. That means finding its IP address first.
How to Change Wi Fi Channel to Fix Internet
On Windows
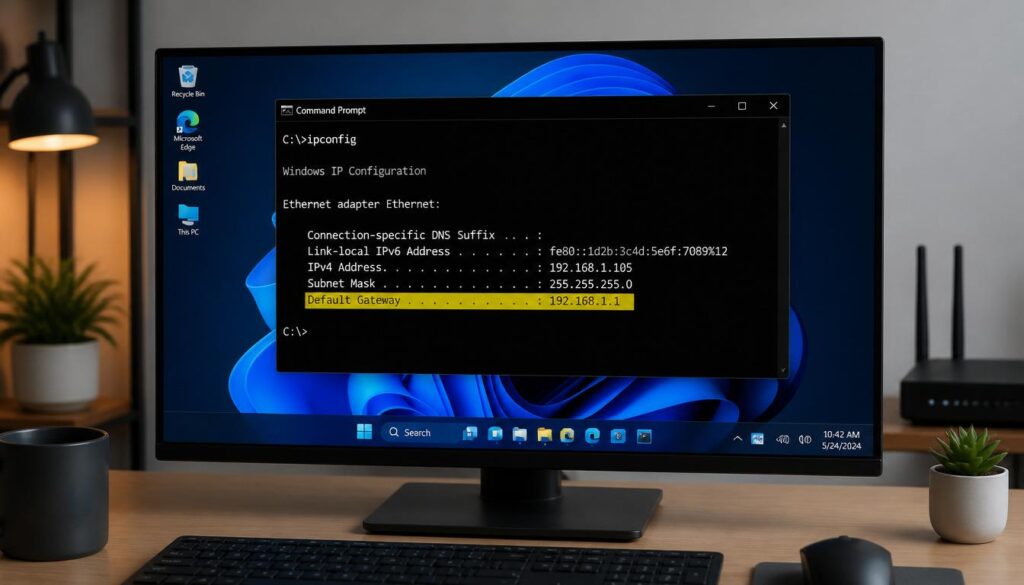
- Press Windows plus R.
- Type cmd and press Enter.
- Type ipconfig and look for Default Gateway.
You will usually see an address like 192.168.1.1 or 192.168.0.1.
On Android
- Open Settings.
- Tap the WiFi icon and select your connected network.
- Look for Gateway or Router IP Address.
On iPhone
- Open Settings and tap WiFi.
- Tap the small info icon beside your connected network.
- The router IP address is listed near the top.
Step by Step Guide to Change WiFi Channel on Any Router
Once you have the IP address, the process below is almost identical across brands.
How to Change Wi Fi Channel to Fix Internet
1. Open a browser and enter the router IP
Type the address into Chrome, Edge, or Firefox and press Enter.
2. Log in with the admin username and password
If you never changed these, check the sticker on the back or bottom of the router.
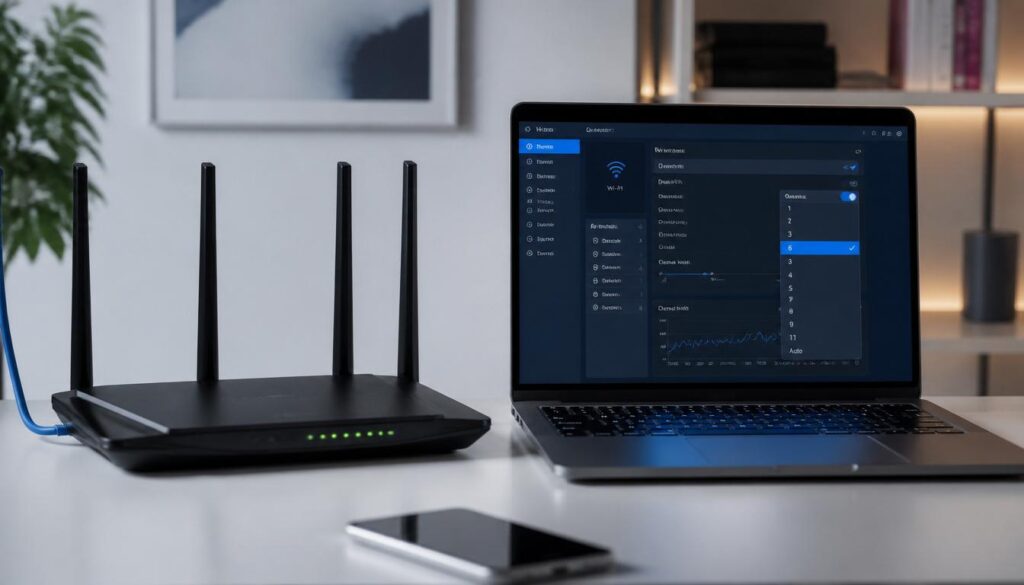
3. Open the Wireless or WiFi settings menu.
This is usually found under Advanced Settings or a left side menu labeled Wireless.
4. Locate the Channel field
Some routers show this under a section called Channel Selection or Wireless Channel.
5. Pick a new channel
Choose 1, 6, or 11 for 2.4 GHz, or one from 36 to 48 for 5 GHz.

6. Save and let the router restart
Give it a minute or two, then reconnect your devices.
7. Run a speed test
Compare it against your previous result to confirm the new channel actually helped.
Best WiFi Channels: 2.4 GHz vs 5 GHz Comparison
| Feature | 2.4 GHz Band | 5 GHz Band |
|---|---|---|
| Non overlapping channels | 1, 6, 11 only | 36, 40, 44, 48, 149, 153, 157, 161 and more |
| Typical congestion | High, especially channel 6 | Low to moderate |
| Range and wall penetration | Better | Weaker |
| Best use case | Older devices, whole home coverage | Gaming, streaming, video calls |
| Speed potential | Lower | Higher |
How to Change Wi Fi Channel to Fix Internet
How to Change Wi Fi Channel to Fix Internet
WiFi Channel Settings by Router Brand and ISP
How to Change Wi Fi Channel to Fix Internet
| Provider or Brand | Where to Change the Channel |
|---|---|
| TP Link | Wireless then Wireless Settings then Channel |
| Netgear | Advanced then Setup then Wireless Setup then Channel |
| Tenda | Wireless Settings then WiFi Settings then Channel |
| Xfinity xFi | xFi app then WiFi settings then Advanced Settings then Channel |
| Spectrum | Spectrum app or admin tool, since Spectrum routers often require the mobile app |
| D Link | Setup then Wireless Settings then Manual Wireless Network Setup |
How to Change WiFi Frequency or Channel on Different Devices
How to Change WiFi Channel on Android
Android phones connect to whatever channel the router is broadcasting, so you cannot pick a channel directly from the phone. Instead, open a WiFi analyzer app from the Play Store, scan nearby networks, note which channel is least crowded, then log in to the router itself and select that channel there.
Switching WiFi Frequency on Windows 11
Windows also follows the router setting rather than letting you choose a channel locally. You can, however, use a free analyzer such as WiFi Analyzer from the Microsoft Store to see which channels are congested around you before making the change on the router. If your internet still drops after switching, our guide on checking whether your internet is actually working can help you rule out other causes.
Switching Channels on an iPhone
Just like Android, the iPhone connects to whichever channel the router uses. The channel itself is only adjustable from inside the router dashboard, not from the iPhone WiFi settings screen.
Understanding DFS and 6 GHz Channels
Newer routers that support WiFi 6E or WiFi 7 can broadcast on the 6 GHz band, which is almost completely free of interference because older devices cannot use it at all. Some 5 GHz channels also support Dynamic Frequency Selection, meaning the router automatically hops to a clearer channel if it detects radar activity nearby. If your router has an Auto or Smart Connect option, turning it on lets the router make these adjustments for you without any manual work. For homes with weak coverage in far rooms, pairing a good channel with a WiFi extender setup usually gives the best overall result.
People Also Ask
How to change WiFi channel?
Log in to the router using its IP address, open the Wireless settings, select a new channel from the dropdown list, then save and restart the router.
How can I change my WiFi channel without a computer?
Most ISP routers, including Xfinity and Spectrum equipment, allow channel changes directly from their mobile app, so a computer is not required. If the app still shows a login error afterward, see our fix for WiFi authentication issues.
How do I switch channels on my router?
Open the router admin page, go to Wireless or WiFi settings, find the Channel option, pick a new one such as 1, 6, or 11, and save the change.
How to change router frequency between 2.4 GHz and 5 GHz?
Inside the same Wireless settings menu, look for a Band or Frequency selector next to the Channel field. Some routers show 2.4 GHz and 5 GHz as separate tabs entirely
What is the most reliable WiFi channel for 5 GHz?
Channels 36, 40, 44, and 48 are widely supported across devices and generally offer dependable performance with minimal interference.
Final Thoughts
A crowded router channel is one of the simplest reasons behind a slow home network, and fixing it costs nothing. It takes a few minutes, and the improvement in speed and stability is often noticeable the same day. If switching channels does not fully solve the problem, the next step is checking your router placement, or comparing plans if your internet provider itself is the real bottleneck.