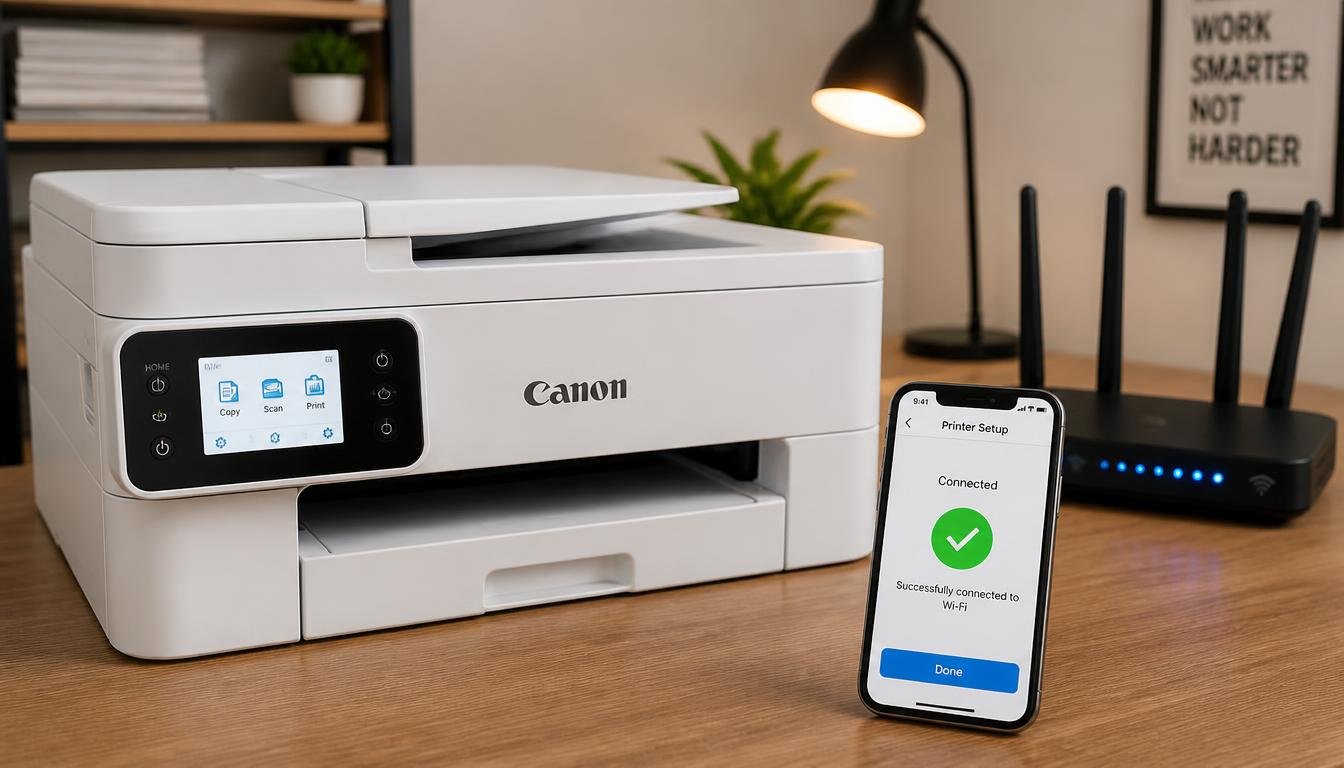
Staring at a blinking orange light while a document sits stuck in the print queue is one of the most common tech emergencies in a home office. If you are trying to figure out how to connect Canon printer to WiFi and the usual quick fixes have not worked, the good news is that the process is predictable once you know which method matches your exact model. This guide covers touchscreen PIXMA and MAXIFY units, screenless models like the MG series, legacy machines such as the G3010 and MG3600, and every phone, laptop, and router complication that other guides tend to skip.
Quick Answer:
To connect a Canon printer to WiFi, use the control panel Setup menu on touchscreen models, the Canon PRINT Inkjet/SELPHY app on screenless models, or the WPS button on the router and printer together. Enter the exact 2.4GHz network name and password, and confirm a steady wireless light before printing.
Diagnostic Matrix: Which Setup Method Fits Your Canon Printer
| Printer Type / Screen Availability | Recommended Setup Method | Primary Button or App Action | Key Prerequisite |
|---|---|---|---|
| Touchscreen PIXMA / MAXIFY (TS, TR6, MB series) | Control Panel Wireless LAN Setup | Setup icon, Device Settings, LAN settings | Exact SSID and password on hand |
| Screenless PIXMA (MG series, TS202, E series) | Easy Wireless Connect (Cableless Setup) | Hold WiFi or Stop button until it flashes | Phone or laptop with Canon PRINT app installed |
| Legacy MegaTank / MAXIFY (G3010, MG3600) | Control panel numeric menu plus reset | Setup button, numbered menu code | Network settings reset before re-adding to new router |
| Router and printer both support WPS | WPS Push Button or WPS PIN | Physical WPS button on router | Router WPS not disabled for security |
| No router available at all | Wireless Direct (printer acts as its own access point) | Enable Wireless Direct in LAN settings | Disabled again once a router connection exists |
Before You Start: Three Checks That Prevent a Failed Setup
- Confirm the printer supports 2.4GHz. The vast majority of Canon PIXMA and MAXIFY models only work with the 2.4GHz band, not 5GHz, even when the router broadcasts both under one combined name.
- Keep the printer within ten feet of the router during setup. Distance and walls are a frequent, invisible cause of a failed handshake on the first attempt.
- Have the exact WiFi password ready, character for character. Passwords are case sensitive, and Canon’s on screen keyboards make it easy to enter a zero instead of the letter O.
How to Connect Canon Printer to WiFi Using the Control Panel (Touchscreen Models)
This method applies to PIXMA TS, TR, MAXIFY, and MegaTank models that include a built in LCD screen.
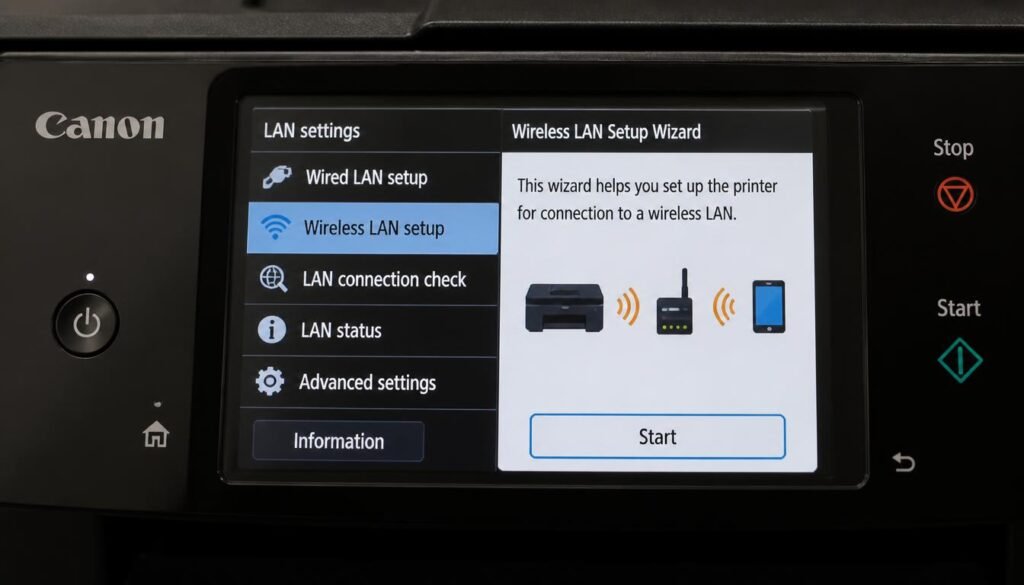
- Press the Setup button on the printer touchscreen, then select Device Settings.
- Choose LAN Settings, then select Wireless LAN Setup.
- Select Wireless LAN Setup Wizard and choose your network name (SSID) from the list.
- Enter your WiFi password on the on screen keyboard and confirm.
- Wait for a steady, non blinking WiFi icon on the display, which confirms the printer joined the wireless network successfully.
If your printer connects but your laptop still shows a connected icon with no working internet, the fault often sits with the router rather than the printer. Our guide on WiFi connected but no internet access covers that separate issue in detail.
How to Connect Canon Printer to WiFi Without a Screen
Several popular Canon models, including the PIXMA MG series and PIXMA TS202, ship with only a handful of physical buttons and no display. For these, the Canon Easy Wireless Connect mode, also called Cableless Setup, is the intended path rather than a workaround.
- Download the Canon PRINT Inkjet/SELPHY app from the App Store or Google Play Store on the phone or tablet you plan to use for setup.
- On the printer, press and hold the WiFi button, or the Stop button on older models, until the power lamp begins to flash. This places the printer into Easy Wireless Connect mode.
- Open the Canon PRINT app, select Printer Registration or Add Printer, and let the app search for the printer’s temporary setup signal.
- Choose your home WiFi network from the list the app displays and enter the password.
- Wait for the app to confirm the connection, then print a test page directly from the app to verify.
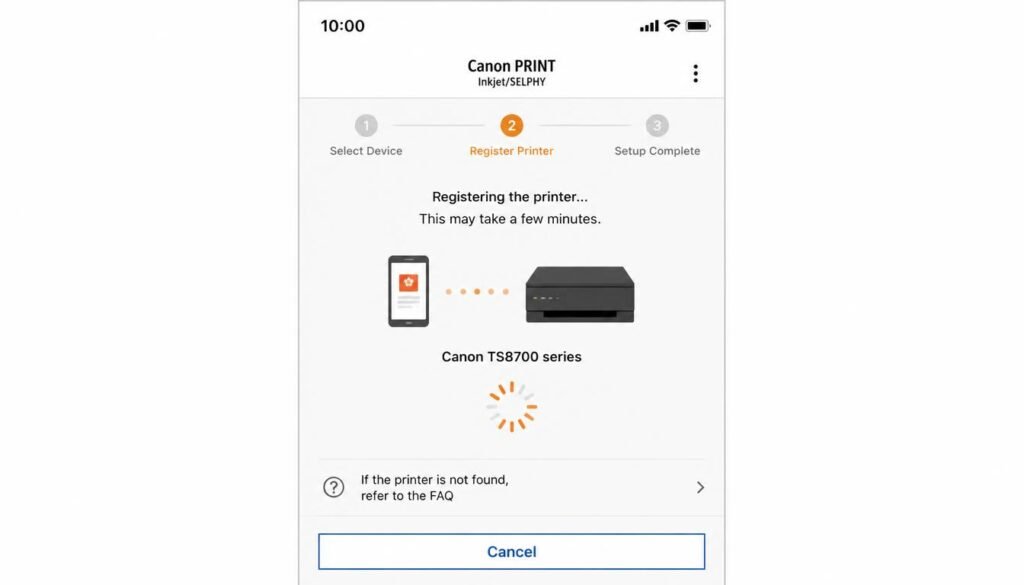
This same Cableless Setup workflow is what Canon uses for its Wi-Fi Connection Assistant tool on Windows and Mac, so a computer without WiFi capability can also complete the process using a temporary USB cable during setup only.
WPS Button vs WPS PIN: Which One to Use
Both methods skip typing a password entirely, but they behave differently and fail for different reasons.
WPS Push Button Method
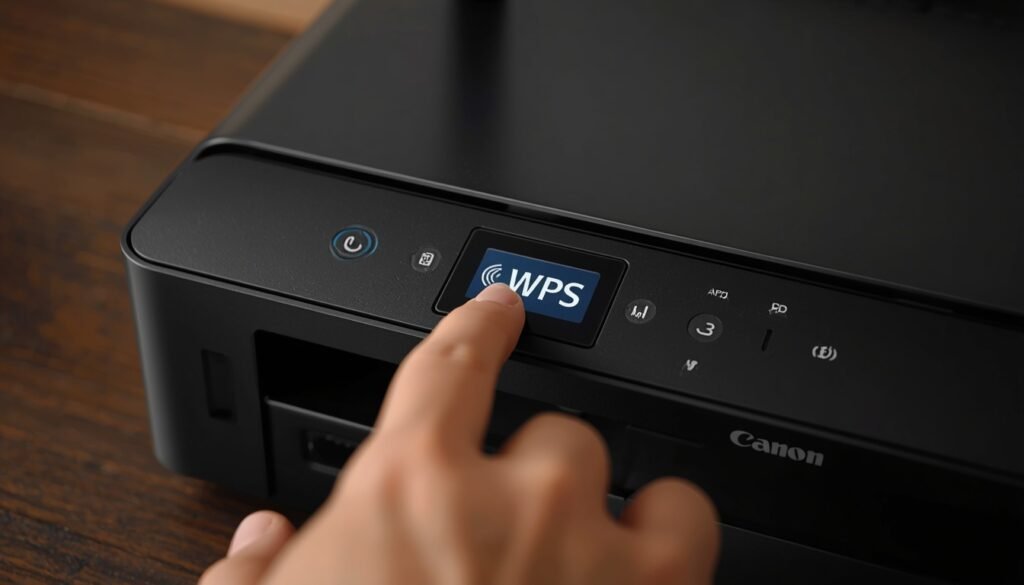
- Locate the physical WPS button on the back or side of your router.
- Press and hold it for two to three seconds.
- Within two minutes, press and hold the WiFi or WPS button on the Canon printer until the wireless light starts blinking.
- Wait for both lights to turn solid, confirming the printer paired automatically without a password.
WPS PIN Method
- On the printer control panel, navigate to LAN Settings and select WPS PIN Code.
- Note the numeric code displayed on the screen.
- Log into the router’s admin page in a browser and locate the WPS PIN entry field, usually under wireless security settings.
- Enter the code shown on the printer and confirm within the router’s displayed time limit, typically two minutes.
How to Connect Canon Printer to WiFi?
If the PIN method keeps timing out, check whether the router disabled WPS automatically after several failed attempts, since many routers do this as a security measure and require the setting to be manually re-enabled.
How to Connect Canon Printer to WiFi on Phone
The Canon PRINT Inkjet/SELPHY app remains the fastest path for both iPhone and Android, whether or not the printer has a screen.
iPhone
- Confirm the iPhone is on the same 2.4GHz WiFi network you plan to use.
- Open the Canon PRINT app and tap Add a Printer.
- Follow the on screen prompts to select the printer’s temporary setup network, then enter your home WiFi credentials.
- For AirPrint compatible models, printing also works directly from any app’s Share sheet with no additional app required, once the printer is confirmed on the network.
Android
- Open the Canon PRINT app, tap the menu icon, and select Printer Registration.
- Grant location and WiFi permissions if prompted, since Android requires this to detect nearby printer setup signals.
- Select your home network and enter the password when the app requests it.
- Confirm the connection with a test print sent directly from the app.
If the phone connects to the home network without issue but the app cannot detect the printer, the problem is frequently on the phone side rather than the printer. Our walkthrough on why a phone will not connect to WiFi rules out that possibility before you keep retrying the printer setup.
How to Connect Canon Printer to WiFi Laptop (Windows and Mac)
Once the printer itself is active on the wireless network, the laptop still needs to be told the printer exists.
Windows 11
- Open Settings, then Bluetooth and Devices, then Printers and Scanners.
- Click Add Device and wait while Windows scans the local network.
- Select the Canon printer once it appears and click Add.
- Allow Windows to install the driver automatically, or download the full driver package from Canon’s support site first if the printer does not appear in the list.
MacOS
- Open System Settings, then Printers and Scanners.
- Click Add Printer, Scanner, or Fax.
- Select the Canon printer under the Default tab.
- Choose AirPrint from the Use dropdown if available, or select the specific Canon driver, then click Add.
How to Connect Canon Printer to New WiFi (Switching Routers)
Moving to a new router, changing the WiFi password, or upgrading from a basic router to a mesh system all require the printer to forget its old network entirely before it can join the new one.
- Touchscreen models: Go to Setup, Device Settings, Reset Settings, then select Reset LAN Settings before starting the wireless setup wizard again from scratch.
- Screenless models: Press and hold the Stop or WiFi button until the power indicator flashes, which clears the saved network profile.
- Using a computer: The Canon IJ Network Tool, installed alongside the printer driver, includes a dedicated network reset option that works even when the printer’s own buttons are unresponsive.
How to Connect Canon Printer to WiFi G3010
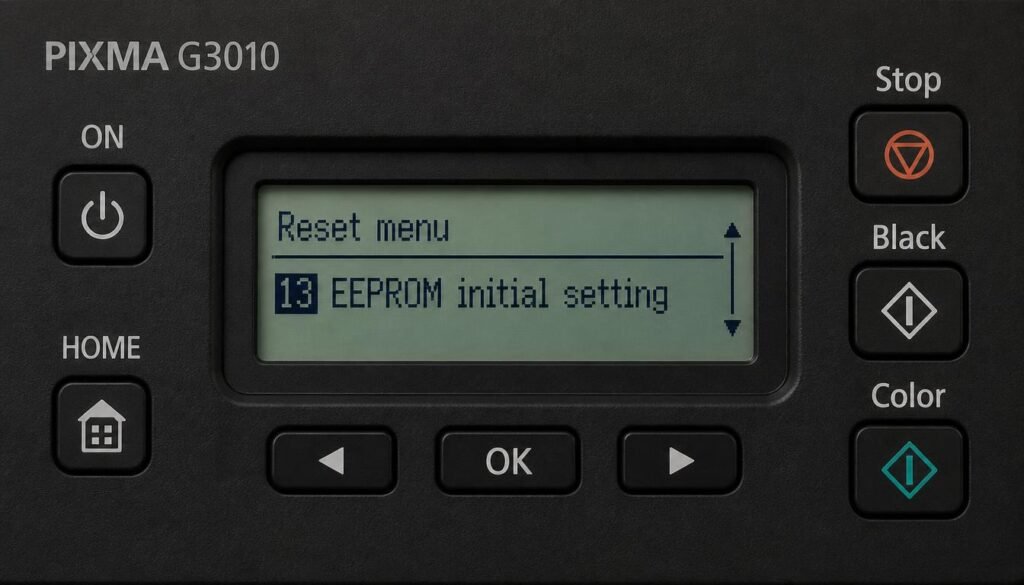
The PIXMA G3010 uses a simple numeric menu system instead of named menu items. To reset the network settings before reconnecting to a new WiFi network, press the Setup button, then press the + button repeatedly until the number 13 appears on the small display, then press either the Black or Color button to confirm. This clears all saved network data, and the printer must go through the full wireless setup wizard again using the Setup CD-ROM instructions or the Canon setup web page for your region.
How to Connect Canon Printer to WiFi MG3600
The MG3600 series follows the same button pattern used across most screenless MegaTank and PIXMA models. Press the Black button until the ON lamp flashes and the WiFi lamp lights, then press the WiFi button repeatedly to cycle through and disable the current wireless connection setting. Once the network and direct lamps both show as off, run Easy Wireless Connect from the Canon PRINT app to join the new network from a clean state.
Disabling Wireless Direct When Using a WiFi Router
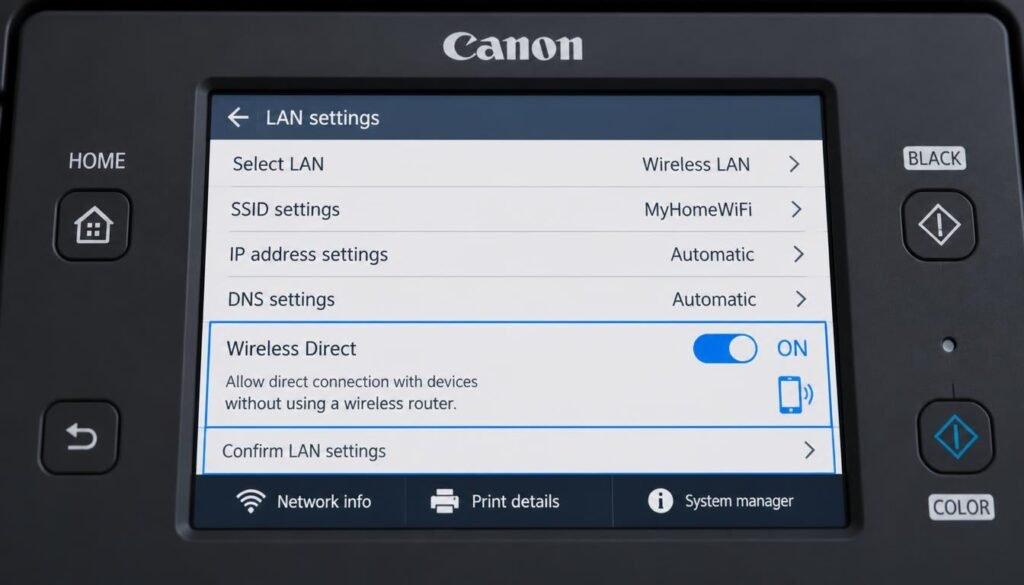
Wireless Direct lets a phone or laptop connect straight to the printer without a router, which is useful when no network exists, but it causes real confusion once a router is available. A device that previously used Wireless Direct may keep trying to reconnect to the printer’s own signal instead of the home network, and firmware updates cannot be applied at all while Wireless Direct stays active. To turn it off, go to Setup, Device Settings, LAN Settings, select Wireless Direct, then choose Enable/disable Wireless Direct and set it to off. On screenless models, this setting is typically managed through the Canon IJ Network Tool on a connected computer instead of a menu on the printer itself.
5GHz vs 2.4GHz: The Most Overlooked Connection Failure
Most modern routers broadcast a 2.4GHz and a 5GHz network at the same time, and many combine them under one shared network name for convenience. Canon PIXMA and MAXIFY printers almost universally support only IEEE 802.11n, g, and b, which means the 2.4GHz band, and cannot see or join a 5GHz only network no matter how many times the wireless setup wizard is repeated. If the router shows a single combined SSID, log into the router’s admin page and temporarily split it into two separate names, connect the printer specifically to the 2.4GHz option, and merge the bands back together afterward if the router’s smart band steering feature is preferred for other devices. Persistent random disconnects after a seemingly successful setup often trace back to this exact issue, so our detailed breakdown of why WiFi keeps disconnecting is worth checking if the printer drops off the network after working correctly for a few days.
Troubleshooting Common Canon WiFi Connection Problems
Even after learning how to connect Canon printer to WiFi successfully, a handful of gaps commonly appear later that most manufacturer guides never fully explain.
Printer Not Finding the WiFi Network
- Move the printer within ten feet of the router for the initial setup only, and relocate it afterward once the connection is confirmed.
- Confirm the network is not hidden, since a hidden SSID on Canon models requires manual entry rather than selection from a list.
- Restart both the router and the printer, since a stale wireless radio state on either device commonly blocks discovery during the scan.
- If the signal reaches the printer but drops in and out during setup, the router placement itself may be the deeper problem, and our guide on fixing a weak WiFi signal covers channel selection and placement fixes that apply to any wireless device, not only printers.
Printer Rejects the WiFi Password
- Check the router’s physical label for the exact factory password, since default passwords often mix a zero with the letter O in a way that is easy to mistype on the printer’s small keyboard.
- If the password changed recently, reset the printer’s saved network profile first rather than attempting to edit the existing saved entry, then run the setup wizard again from a clean state.
- Repeated rejections after several careful attempts sometimes point to a router side authentication conflict rather than a typing mistake, which our guide on WiFi authentication issues explains in more depth across different security protocol combinations.
Printer Connects but Computer Cannot Find It
- Open the printer queue on the computer and confirm Use Printer Offline is unchecked.
- Print a fresh network configuration page from the printer’s Setup menu and compare the listed IP address against the one saved on the computer, since a router restart can reassign a new address to the printer.
- If the computer cannot resolve the printer by name even though the IP address is correct, the issue may extend beyond the printer to a broader DNS problem, which our walkthrough on DNS Server Not Responding on Windows 11 addresses directly.
Frequently Asked Questions
How do I reset my Canon printer to a new WiFi network?
On touchscreen models, open Setup, then Device Settings, then Reset Settings, and select Reset LAN Settings before running the wireless setup wizard again. On screenless models, hold the WiFi or Stop button until the power light flashes to clear the saved network profile.
How do I manually connect my printer to WiFi?
Open the printer’s Setup menu, select Device Settings, then LAN Settings, then Wireless LAN Setup, and choose Manual Entry if the network name does not appear in the automatic scan list. Enter the exact SSID and password to complete the connection.
How do you connect the Canon PIXMA printer to WiFi?
Most PIXMA models with a screen use the Setup button, Device Settings, LAN Settings, and Wireless LAN Setup Wizard path. Screenless PIXMA models instead rely on the Canon PRINT app and Easy Wireless Connect mode to complete the same process.
How do I connect my Canon G3010 printer to WiFi?
Use the numeric Setup menu to select option 13 for a network reset if reconnecting to a new network, then follow the standard wireless setup wizard from Canon’s setup CD or web based setup page for the G3010 model.
How do I connect my Canon printer if it does not have a screen?
Install the Canon PRINT Inkjet/SELPHY app, place the printer into Easy Wireless Connect mode by holding the WiFi or Stop button until the light flashes, then complete the network selection and password entry directly inside the app.
Why is my Canon printer not finding my WiFi network?
The most common causes are distance from the router, a hidden SSID that requires manual entry, or a router broadcasting only on the 5GHz band, which most Canon printers cannot detect at all.
How do I connect my Canon printer to a 5GHz WiFi router?
Canon PIXMA and MAXIFY printers generally do not support 5GHz at all. Split the router into separate 2.4GHz and 5GHz network names, then connect the printer specifically to the 2.4GHz option.
What is the default password for Canon Wireless Direct?
Canon generates a unique default Wireless Direct password for each printer, viewable on the printer’s LAN Settings, Wireless Direct menu under Show Password, rather than using one universal default across all models.
How do I connect my Canon printer to a laptop without an Ethernet cable?
Once the printer is active on the WiFi network, add it through Settings, Bluetooth and Devices, Printers and Scanners on Windows, or System Settings, Printers and Scanners on Mac, using the wireless connection rather than a cable.
How do I fix Canon printer offline status after changing routers?
Print a fresh network configuration page to check the printer’s current IP address, remove the old printer entry from the computer, and re-add it so the operating system picks up the new address instead of the outdated one.
Final Thoughts
Once you understand that how to connect Canon printer to WiFi barely changes across the product line, the process stops being a guessing game. Touchscreen models lean on the control panel wizard, screenless models rely on Easy Wireless Connect through the Canon PRINT app, and every legacy G-series or MG-series unit responds to the same underlying reset logic even though the button combinations look different on paper. Keep the 2.4GHz requirement, the Wireless Direct setting, and the router’s WiFi password in mind, and the printer should be back online within a few minutes regardless of which model sits on the desk.