Your Chromebook handles email, browser tabs, and Google Docs without complaint, but the moment you need a Windows only accounting tool, a specific PC game, or a legacy desktop application, that lightweight design starts to feel like a wall. The good news is that there is not just one way to get Windows on a Chromebook. There are several, and which one is right for you depends entirely on your hardware, your patience for terminal commands, and whether you are willing to open the case.
Quick Answer (How to Get Windows on Chromebook)
There are two main paths to get Windows on a Chromebook: a full local installation, which requires enabling Developer Mode, disabling hardware write protection, and flashing custom UEFI firmware such as MrChromebox before installing Windows 10 or Windows 11 from a USB Drive, and a cloud based alternative, which streams a full Windows desktop through a service like Chrome Remote Desktop or Parallels without touching the Chromebook’s firmware at all.
Before you commit to a method, it helps to see how the major options actually compare, because the “best” answer changes depending on whether your Chromebook runs on x86 64-bit hardware or an ARM chip.
Diagnostic Matrix: Which Method Fits Your Chromebook
| Method | Technical Complexity | Hardware Requirements | Performance Expectation | Ideal Use Case |
|---|---|---|---|---|
| Custom UEFI + Full Windows Install | High | x86 64-bit Intel or AMD Chromebook, 4 GB RAM minimum, 64 GB storage minimum | Near native, full desktop app support | Users who need permanent, offline Windows software |
| USB Bootable Windows Install (Rufus method) | High | Same x86 64-bit hardware requirement, USB drive 8 GB or larger | Near native once drivers are installed | Users comfortable with terminal commands who want a clean dual boot |
| Cloud PC / Remote Desktop Streaming | Low | Any Chromebook, including ARM models, stable internet connection | Depends entirely on connection speed, no local storage used | Casual users who need occasional access to Windows software |
| Parallels Desktop for Chromebook | Low | Enterprise licensed Chromebook, ARM or x86 | Smooth for light productivity apps, limited for gaming | School or work managed devices with Parallels already deployed |
Now let us walk through exactly how each of these works, starting with the method that gives you a genuinely permanent Windows installation.
Step 1: Confirm Whether Your Chromebook Can Actually Run Windows
This is the step every competing guide skips, and it is the single biggest reason people waste hours on a failed install. Chromebooks ship with two very different chip families, and only one of them can run a full desktop copy of Windows.
- x86 64-bit Chromebooks (Intel Celeron, Pentium, Core i3/i5/i7, or AMD equivalents) can run a real, native copy of Windows 10 or Windows 11 once the firmware is unlocked.
- ARM based Chromebooks (MediaTek, Qualcomm Snapdragon) cannot run a native x86 build of Windows at all. There is currently no supported ARM version of Windows that will run natively on these devices, which means owners of ARM Chromebooks are limited to the cloud streaming and remote desktop methods described later in this guide.
You can check your chip by opening chrome://system in the address bar and searching for “CPU,” or by checking the model number against the Chrome OS device list. If your slow boot times have you second guessing your hardware anyway, our guide on fixing a Windows 11 machine that has become slow over time covers the same diagnostic mindset you will need here.
Step 2: Enable Developer Mode
Developer Mode unlocks the underlying Linux shell and removes the software restrictions Chrome OS places on the boot process. It is a required first step for both the custom firmware method and the USB install method.
- Turn off your Chromebook completely.
- Press and hold Esc and Refresh, then tap the Power button while continuing to hold both keys. This opens Recovery Mode.
- When the “Chrome OS is missing or damaged” screen appears, press Ctrl+D, then press Enter to confirm you want to turn on Developer Mode.
- Wait through the transition, which wipes local data and can take ten to fifteen minutes.
- On every subsequent boot, you will see a warning screen. Press Ctrl+D or simply wait thirty seconds to continue into Chrome OS in developer mode.
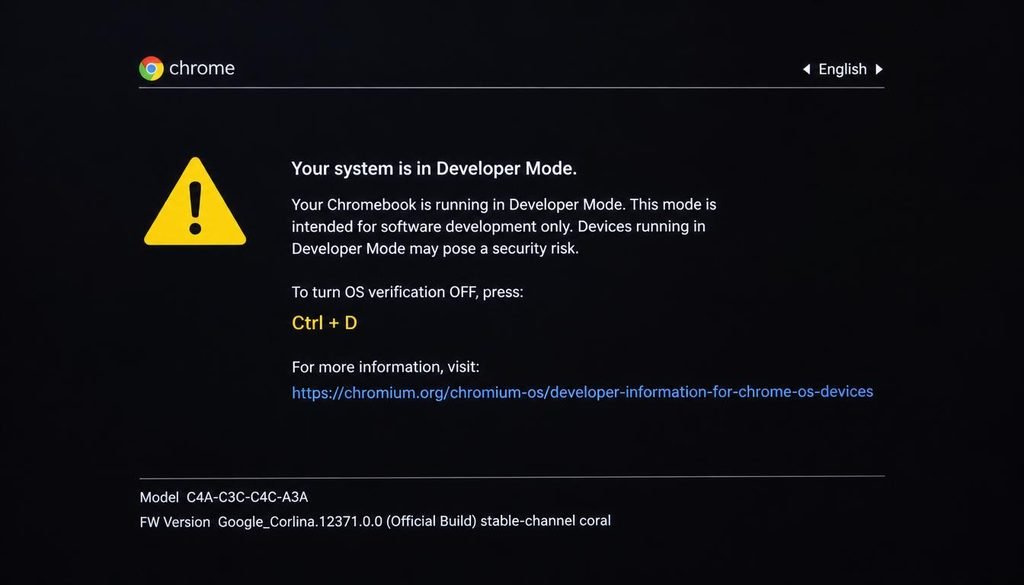
Once you are inside developer mode, open a Shell Prompt through the built in terminal (Crosh) by pressing Ctrl+Alt+T, then typing shell and pressing Enter. This gives you the root access needed for the firmware work in the next step.
Step 3: Disable Hardware Write Protection
This is the technical depth most tutorials leave out entirely, and it is exactly where most failed Windows installs happen. Chrome OS ships with a hardware level write protection mechanism controlled by a security chip called the CR50 (or its successor, the Titan chip on newer devices). Even after you enable Developer Mode in software, the firmware itself remains locked against modification until this protection is lifted at the hardware level.
There are two accepted ways to do this, and the correct one depends on your specific model.
- The Write-Protect Screw method: Many older and mid range Chromebooks have a small screw on the motherboard, sometimes labeled or marked near the battery connector, that physically completes or breaks the write protection circuit. Removing this screw, which requires opening the bottom case with a small screwdriver, disables write protection immediately.
- The battery disconnection method: On newer models without an accessible screw, briefly disconnecting the internal battery connector for roughly sixty seconds while the device is unplugged resets the CR50 chip’s write protection state on the next boot.
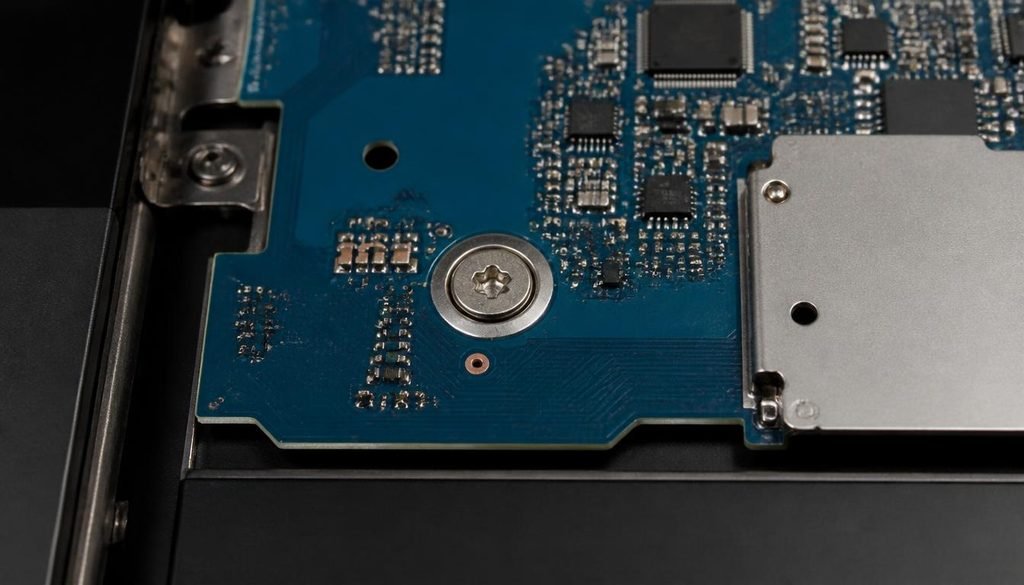
Both methods void your warranty and carry a real risk of hardware damage if you are not comfortable working inside a laptop chassis. If you are not confident opening the case yourself, this is the point where the cloud based methods later in this guide become the safer choice.
Step 4: Flash Custom UEFI Firmware With MrChromebox
Once write protection is disabled, your Chromebook still runs on Coreboot, Google’s own firmware, which does not understand how to boot a Windows installer. You need to replace it with a UEFI compatible firmware, and the community standard tool for this is MrChromebox custom UEFI firmware.
- From your Shell Prompt, run the official installation script provided directly on the MrChromebox firmware utility site. Always verify you are pulling the script from the legitimate MrChromebox domain rather than a mirrored or third party copy.
- Choose the Full ROM UEFI Firmware option rather than the legacy SeaBIOS payload if you want long term Windows 11 compatibility, since Windows 11 specifically requires a UEFI boot environment rather than legacy BIOS emulation.
- Confirm the flash when prompted. This process typically takes two to five minutes and should not be interrupted or powered off mid flash.
- Once complete, reboot. You should see a UEFI boot menu instead of the standard Chrome OS recovery screen.
If your device stalls or shows a black screen after flashing, do not panic immediately. Most recovery issues at this stage trace back to a corrupted download rather than bricked hardware, similar to the corrupted media errors covered in our guide on repairing a Windows installer that fails partway through setup, which walks through the same recovery logic for a dual boot Linux and Windows setup.
Step 5: Build a Bootable Windows USB Drive
With UEFI firmware in place, you are ready to actually install Windows using a standard USB Drive, which remains the most reliable method for how to install Windows on Chromebook with USB.
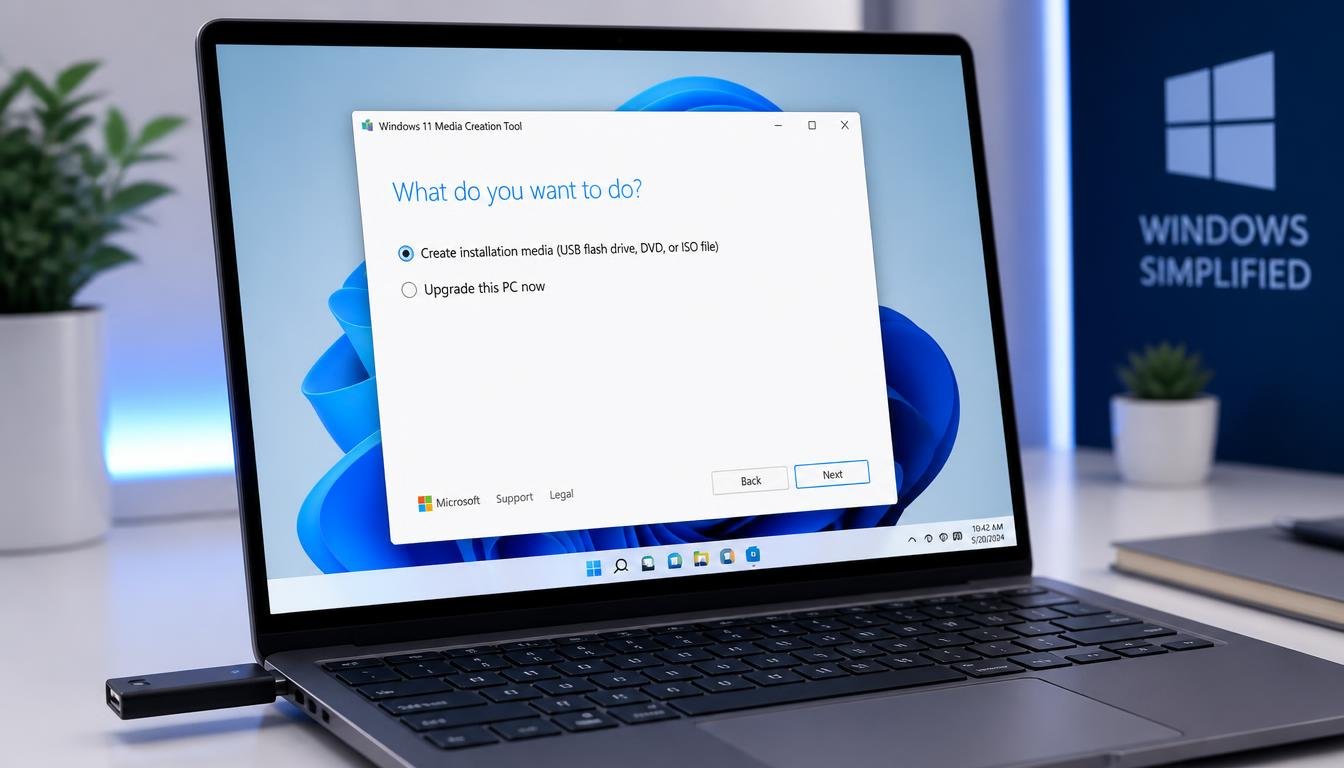
- On a separate working computer, download either the Windows 10 for Chromebook free download 64 bit ISO or the Windows 11 for Chromebook free download ISO directly from Microsoft’s official software download page. Avoid third party ISO mirrors, which are a common source of tampered installers.
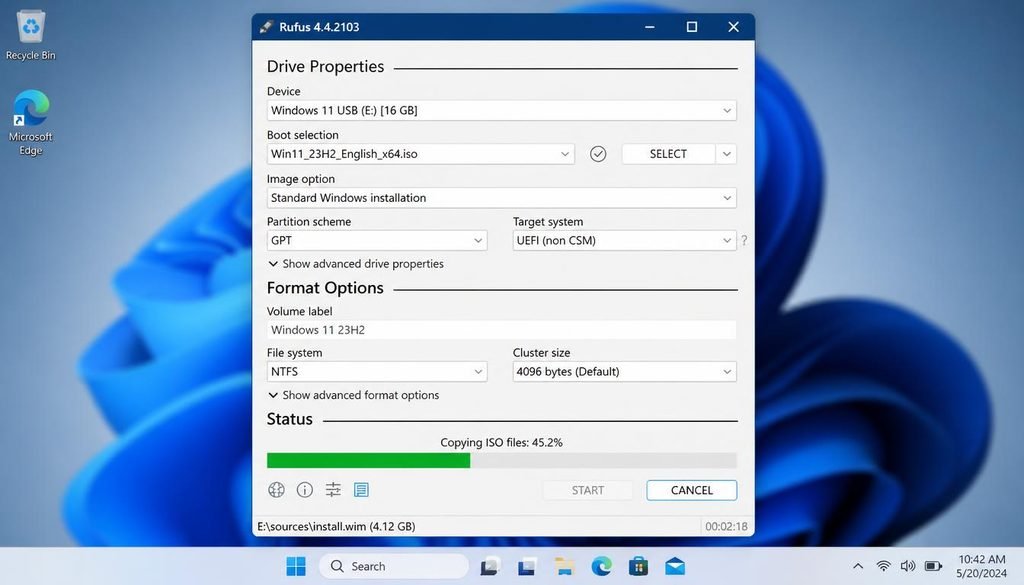
- Download and open Rufus, a free and widely trusted tool for creating bootable media.
- Insert a USB drive with at least 8 GB of storage. Note that all existing data on the drive will be erased.
- In Rufus, select your downloaded ISO image, set the partition scheme to GPT for UEFI systems, and click Start.
- Once Rufus finishes, insert the USB drive into your Chromebook, reboot, and select the USB device from the UEFI boot menu.
- Follow the on screen Windows setup prompts, selecting your target drive partition when asked.
How to Get Windows on Chromebook?
If your Chromebook has limited internal storage, this is also a good moment to check available space using the same principles from our guide on understanding what a subnet is and how local network segments are structured, since Windows will refuse to install on a partition it considers too small for future updates.
How to Get Windows on Chromebook Without USB
If you do not have a spare USB drive or a second computer available, there are two workable approaches for how to get windows on chromebook without usb.
- Network boot deployment: Some MrChromebox firmware builds support PXE network booting, which pulls the Windows installation image directly from a local server on your network rather than a physical drive. This requires a second device configured as a PXE server, which is more advanced but eliminates the USB requirement entirely.
- ISO mounting from internal storage: With UEFI firmware installed, you can copy the Windows ISO directly onto a spare internal storage partition and mount it during boot using the UEFI shell, bypassing external media altogether. This method demands more free internal storage since the ISO file itself, often four to six gigabytes, needs to live directly on the device.
Both non USB routes assume you have already completed the developer mode, write protection, and firmware steps above. They are not standalone shortcuts around the hardware unlocking process.
Windows 10 vs Windows 11 on a Chromebook: Which Should You Install
The choice between Windows 10 and Windows 11 on repurposed Chromebook hardware comes down to two practical factors: your firmware compatibility and your available drive space.
Windows 11 enforces stricter requirements, including UEFI boot mode, Secure Boot capability, and in most consumer builds, a Trusted Platform Module. Many older Chromebooks lack a discrete TPM chip, though the MrChromebox community has documented workarounds that bypass this check during setup. If your device is a mid range or newer x86 model from the last few years, Windows 11 is generally the better long term choice since it will continue receiving security updates further into the future.
Older or lower spec Chromebooks, particularly those with 4 GB of RAM or less, often run noticeably better on Windows 10, and the Windows 10 for Chromebook free download 32 bit build exists specifically for devices with limited RAM that cannot properly address a 64-bit operating system. Confirm your chip’s addressing capability before choosing the 32-bit path, since installing a 32-bit operating system on 64-bit capable hardware unnecessarily limits your future software compatibility.
Driver Troubleshooting: What Breaks After Installing Windows on Chromebook
This is the technical gap left open by nearly every existing tutorial, and it is the single most common reason people abandon the project halfway through. Chrome OS hardware, particularly the trackpad, audio codec, and WiFi module, was never designed with Windows driver support in mind, so expect some manual work here.
- Trackpad not working: Most Chromebook trackpads use a Synaptics or Elan touchpad controller that Windows does not recognize automatically. Downloading the correct generic PS/2 or I2C HID driver from the chipset manufacturer’s site, rather than relying on Windows Update, resolves this in the majority of cases.
- No audio output: Chromebook speakers frequently run through a Realtek or Cirrus Logic audio codec that requires a manually installed driver package rather than the generic Windows audio driver. The MrChromebox community forum maintains a running list of confirmed working audio driver packages by device model.
- WiFi module not detected: Many Chromebook WiFi cards are Intel or Qualcomm modules that do need a Windows specific driver installed manually through Device Manager. If you are dealing with persistent drops even after driver installation, our troubleshooting guide on fixing WiFi that connects but refuses to load pages applies equally well once Windows is running.
Always download drivers directly from the chipset manufacturer rather than a generic Windows driver aggregator site, since mismatched drivers are the leading cause of the blue screen crashes reported after these installs.
Skip the Hardware Work: Cloud Based Alternatives to a Full Windows Install
If opening your Chromebook’s case, disabling write protection, and hunting down obscure drivers does not sound appealing, or if you own an ARM based Chromebook that cannot run Windows natively at all, these alternatives deliver Windows software without touching your firmware.
- Chrome Remote Desktop: Install the Chrome Remote Desktop extension on both your Chromebook and a separate Windows PC you already own. This streams your existing Windows desktop directly to your Chromebook screen over the internet, with zero firmware changes required.
- Parallels Desktop for Chromebook: Available primarily through enterprise and education licensing, Parallels runs a full Windows virtual machine directly inside Chrome OS. Performance depends heavily on your Chromebook’s RAM, but it avoids dual boot entirely.
- Cloud PC services: Subscription based Windows streaming services deliver a complete Windows desktop through the browser, billed similarly to a monthly utility. This works on any Chromebook, ARM or x86, provided your internet connection can sustain the video stream, a factor you can check with our guide on diagnosing why your download speeds are slower than expected.
For anyone who only occasionally needs a single Windows program rather than a permanent installation, these cloud routes typically deliver a better overall experience than the hardware modification path, with far less risk.
How to Revert Your Chromebook Back to Chrome OS
If the Windows install does not work out, or you simply want your original Chrome OS experience back, reversing the process is more straightforward than the initial setup.
- Download the Chrome OS recovery image for your exact device model from Google’s official Chromebook recovery utility.
- Reflash the stock Coreboot firmware using the same MrChromebox script used earlier, selecting the restore or “back to stock” option this time.
- Re-enable hardware write protection by reinstalling the Write-Protect Screw or reconnecting the battery, depending on which method you originally used.
- Boot from a Chrome OS recovery USB drive created through the Chromebook Recovery Utility to complete the restoration.
Your device will return to a fully supported, warranty compliant state, though Google support may still flag the device’s developer mode history in some diagnostic checks.
Frequently Asked Questions About How to Get Windows on Chromebook
How to get windows on chromebook: what is the short version?
The fastest path is enabling Developer Mode, disabling write protection, flashing MrChromebox firmware, then installing from a USB Drive. The sections above walk through each stage in full detail.
How do I turn my Chromebook to Windows?
You must enable Developer Mode, disable hardware write protection through either the Write-Protect Screw or a battery disconnect, flash MrChromebox custom UEFI firmware, and then install Windows from a bootable USB Drive. This process only works on x86 64-bit Chromebooks, not ARM models.
Can I use my Chromebook as a PC?
Yes, once you have completed a full Windows installation using the developer mode and custom firmware method described above, an x86 64-bit Chromebook functions as a genuine Windows PC with full desktop application support.
How do I add a window on my Chromebook?
If you are asking about opening an additional application window within Chrome OS itself rather than installing Windows, you can open a new window by pressing Ctrl+N in most Chrome OS applications, which is a completely separate topic from installing the Windows operating system.
Can a Chromebook be converted to Windows 11?
Yes, provided the Chromebook uses x86 64-bit hardware with UEFI capable firmware after the MrChromebox flash. Devices lacking a discrete TPM chip may require a documented setup bypass during the Windows 11 installation process.
Can you run Windows software on an ARM-based Chromebook?
Not natively, since there is no supported x86 build of Windows for ARM chips used in Chromebooks. ARM Chromebook owners should rely on Chrome Remote Desktop, Parallels Desktop, or a cloud PC streaming service instead.
Does installing Windows erase all local files on a Chromebook?
Yes, both enabling Developer Mode and the subsequent Windows installation wipe local Chrome OS data and any files stored only on the device. Back up everything to Google Drive or an external drive before beginning.
How do you revert a Chromebook back to Chrome OS after installing Windows?
Reflash the original Coreboot firmware using the MrChromebox restore option, re-enable hardware write protection, and reinstall Chrome OS using the official Chromebook Recovery Utility from a USB drive.
Why is my trackpad not working after installing Windows 10 on Chromebook?
Chrome OS trackpads typically use Synaptics or Elan controllers that Windows does not recognize by default. Installing the correct generic HID or I2C driver from the chipset manufacturer, rather than relying on Windows Update, resolves this in most cases.
Is it possible to run Windows 11 on Chromebook without developer mode?
No, a full local Windows 11 installation requires Developer Mode to access the shell needed for the firmware flashing process. Cloud based alternatives such as Parallels or remote desktop streaming avoid developer mode entirely but do not install Windows locally.
What hardware specifications are required to run Windows 11 on Chromebook smoothly?
You generally need an x86 64-bit Intel or AMD processor, at least 4 GB of RAM though 8 GB is more comfortable, 64 GB or more of storage, and UEFI capable firmware with Secure Boot support after the MrChromebox flash.
Final Thoughts
If you take one thing away from this guide on how to get windows on chromebook, let it be this: check your chip architecture before you touch a single screw. Getting Windows on a Chromebook is genuinely achievable, but it is not a five minute task, and the right method depends entirely on your specific hardware and your comfort level with opening a laptop case. x86 64-bit owners who need a permanent, fully functional Windows environment should commit to the developer mode, firmware, and USB installation path. ARM Chromebook owners, and anyone who wants Windows software without the hardware risk, will get a smoother experience from Chrome Remote Desktop or a cloud PC service instead.
If you want to keep your freshly installed Windows system running fast without unnecessary background processes, you can follow our tutorial on using a Windows 11 debloater to safely boost PC speed and free up hidden CPU resources. Additionally, removing integrated background sync services like Microsoft’s cloud storage can prevent unexpected high disk usage, which you can easily manage by following our step-by-step instructions to uninstall OneDrive on Windows 11 completely.