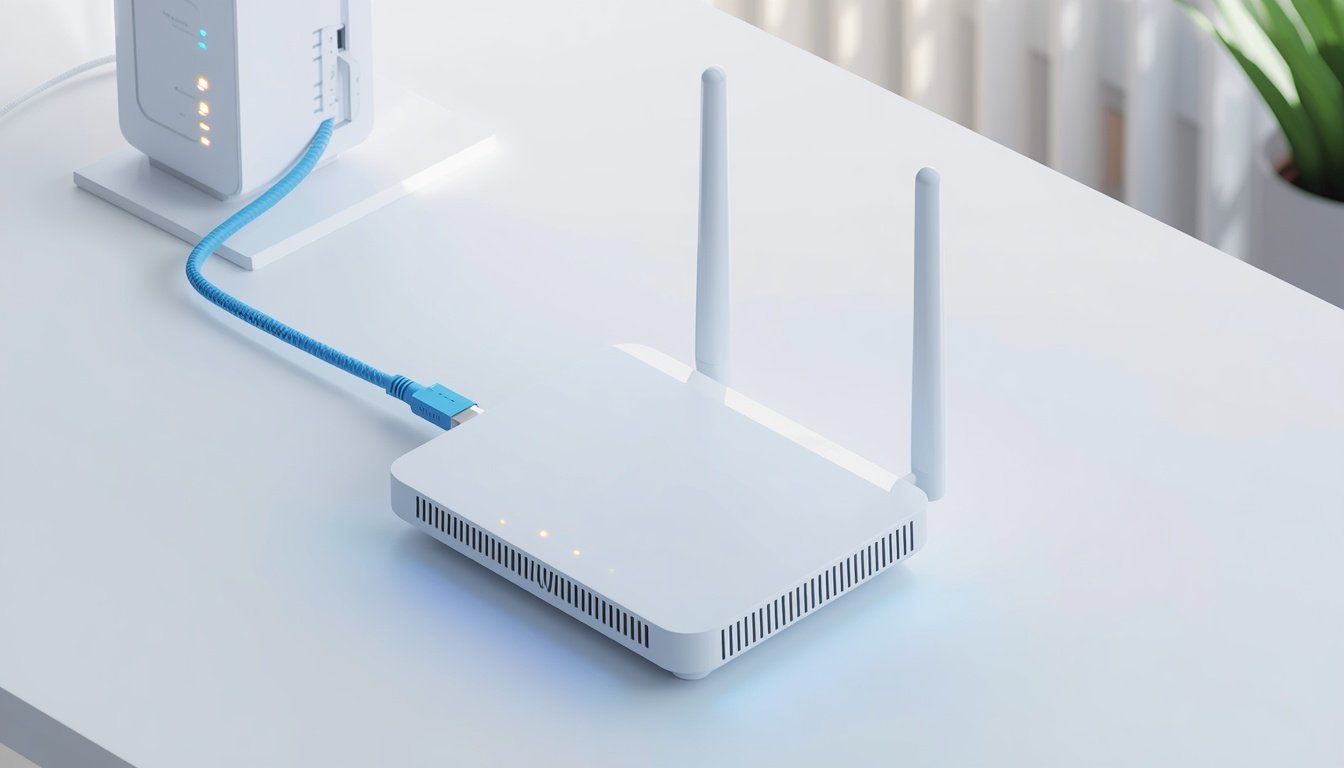
Unboxing a new router should feel like a quick tech upgrade, right up until the status lights blink amber and your smartphone displays the frustrating “Connected, no internet” notification. If you have ever stared at a tangle of Ethernet cables wondering which port goes where, this complete guide breaks down the process into clear, actionable steps. From physical cabling to advanced network security, here is how to get your home network running properly.
Quick Answer (How to Set Up a Router)
To set up a home router, connect its WAN (Internet) port to your modem using an Ethernet cable. Power on the modem first and wait until it is fully connected, then power on the router. Connect your computer or phone to the router, open its setup page or mobile app, and follow the setup wizard. Change the default admin credentials, set a custom WiFi network name (SSID), choose a strong password, and enable WPA3 security when available.
Router Setup Stages at a Glance
Before jumping into manual configuration, use this quick roadmap to identify where you are in the installation process.
| Setup Phase | Target Hardware | Action Required | Expected Result |
| 1. Physical Cabling | Modem & Router WAN Port | Connect Ethernet cable from modem to WAN port. | WAN indicator activates. |
| 2. Power Sequence | Modem & Router | Boot modem completely before turning on router. | Internet connection is detected. |
| 3. Gateway Access | Admin Portal | Open router setup page or app. | Setup wizard appears. |
| 4. Credentials | Router Account | Change default admin credentials. | Router settings are secured. |
| 5. Wireless Config | WiFi Settings | Set SSID and WiFi password. | Devices can join your network. |
| 6. Encryption | Security Settings | Select WPA3 or WPA2/WPA3 Mixed Mode. | Modern WiFi security is enabled. |
What You Need Before Setting Up a Router
Gather these essentials before unplugging any existing hardware:
- Router and power cable: Use the official power adapter included with your router.
- Ethernet cable: A Cat5e or Cat6 cable is usually sufficient for most home internet connections.
- Active modem or internet connection: Depending on your ISP, this may be a modem, ONT, or Ethernet wall jack.
- Phone, tablet, or computer: You will use this to configure the router.
- Router label information: Check the sticker on the bottom or back of the router for its default WiFi name, password, app, or setup address.
Pro Tip: Take a photo of the router label before installing it in a difficult-to-reach location. This makes it easier to find the default setup information later.
How to Set Up a Router Step by Step
Follow these steps in order to avoid common router setup problems.
Step 1: Connect the Modem to the Router
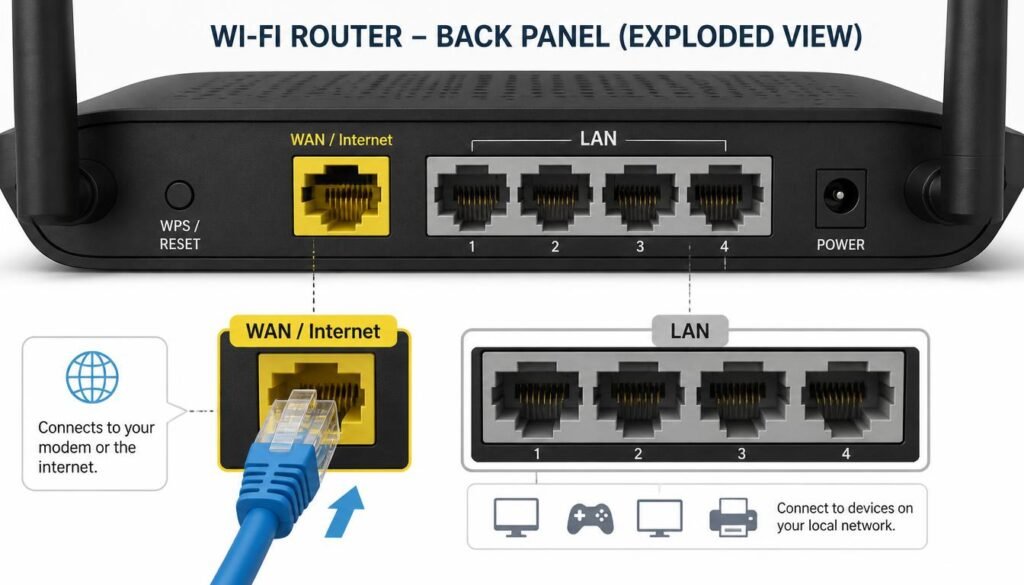
Locate the port labeled WAN or Internet on the back of your router. This port is usually separated from the numbered LAN ports and may be a different color. Connect one end of an Ethernet cable to your modem or internet source and connect the other end to the router WAN or Internet port.
- Important: Do Not Use a LAN PortThe internet connection coming from your modem should normally go into the WAN or Internet port. The numbered LAN ports are used for local devices such as desktop computers, gaming consoles, smart TVs, and network storage devices. Connecting the modem to the wrong port can prevent the router from establishing an internet connection. If your network interface acts strangely later, refer to our troubleshooting guide on fixing Windows network adapter issues.
Step 2: Use the Correct Power-On Sequence
The order in which you restart networking equipment can affect how the modem and router receive an internet connection.
- Turn off or unplug both the modem and router.
- Turn on the modem first.
- Wait until the modem finishes starting and its internet connection is active.
- Turn on the router.
- Wait approximately two minutes for the router to finish booting.
Your router should now attempt to obtain an internet connection from the modem.
Step 3: Connect Your Phone or Computer to the Router
You can connect to the router using either Ethernet or WiFi:
- Option 1 (Wired Connection): Connect an Ethernet cable from your computer to one of the router numbered LAN ports. A wired connection is useful during initial setup because it provides a stable connection.
- Option 2 (Wireless Connection): Open WiFi settings on your phone or laptop. Look for the default WiFi network name printed on your router label and connect using the default security key.
Step 4: Open the Router Setup Page
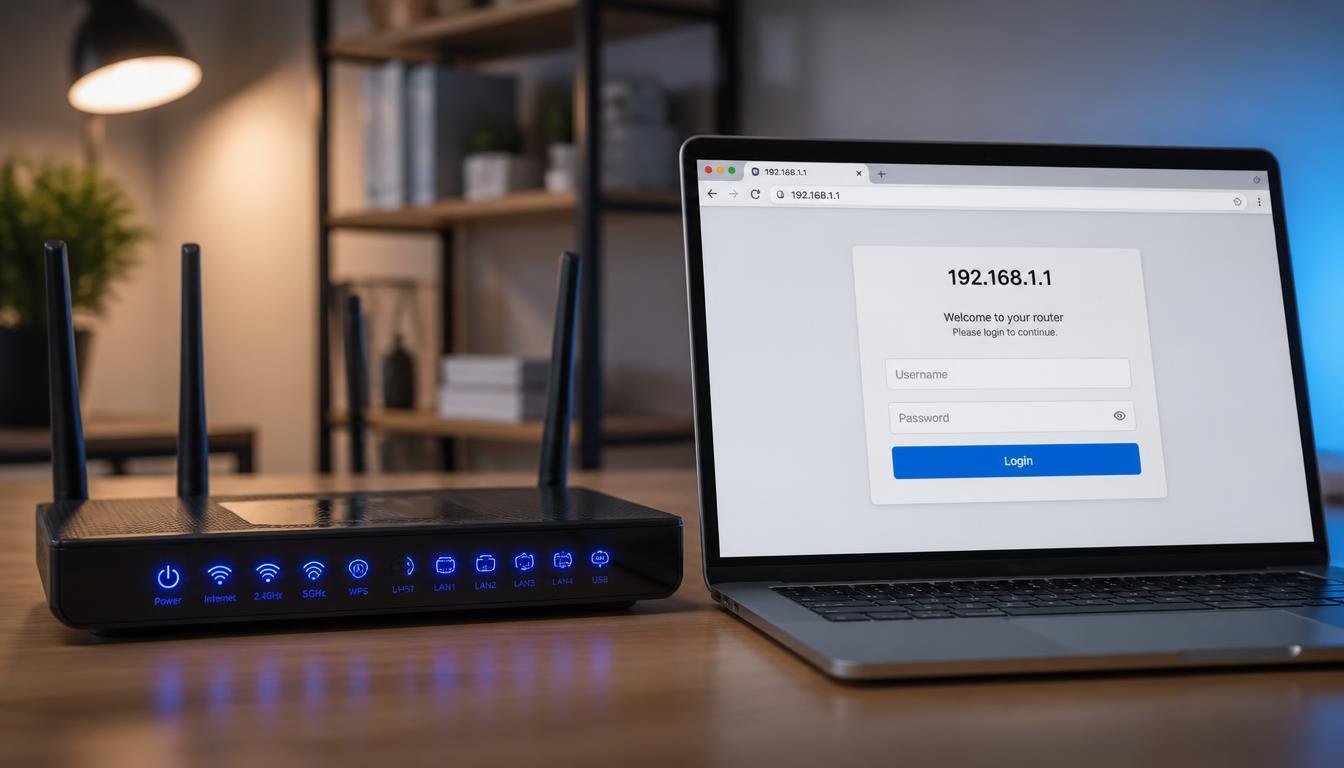
Many modern routers can be configured through a mobile app, while others use a web-based setup page. Open a web browser and enter the router setup address directly into the address bar.
Common default addresses include:
192.168.1.1192.168.0.110.0.0.1
Enter the default administrative credentials listed on your hardware label when prompted.
How Router Setup Differs by Brand
The physical connection process is similar across manufacturers, but the configuration method may differ depending on your router brand.
- TP-Link Router Setup: Configured using the TP-Link Tether app or the web setup page (
tplinkwifi.netor192.168.0.1). - NETGEAR Router Setup: Configured using the Nighthawk app or the web interface (
routerlogin.net). - ASUS Router Setup: Configured using the ASUS Router app or the web administrative panel (
router.asus.com). - Other Router Brands: D-Link, Linksys, Tenda, and Xiaomi follow the same structure: connect the source to the WAN port, access the gateway, and run the quick setup wizard.
How to Find Your Router Gateway IP Address via Command Line
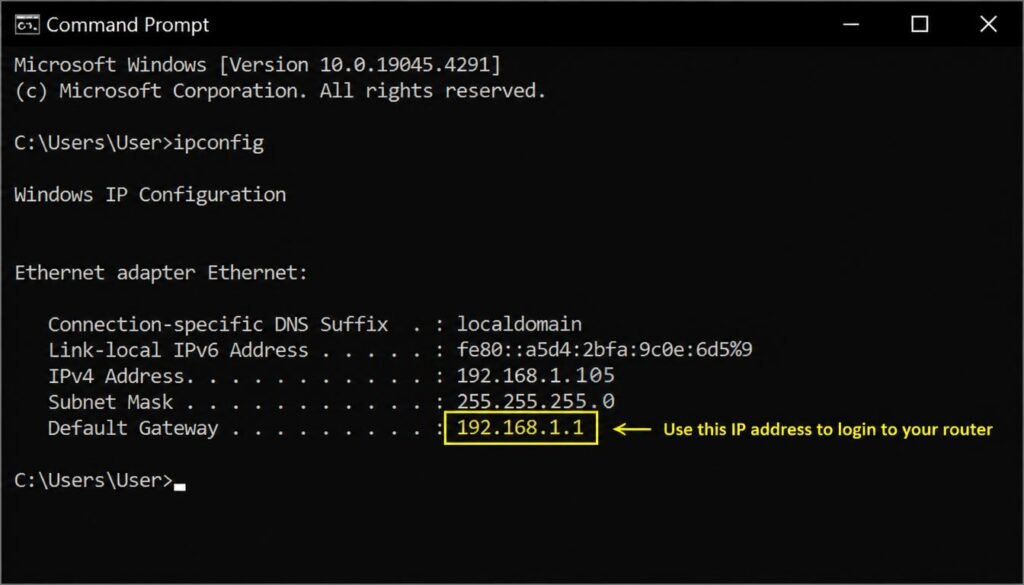
If common addresses such as 192.168.1.1 do not work, your router may use a customized gateway address. You can find it instantly using terminal commands.
On Windows (Command Prompt)
- Press
Windows Key + R, typecmd, and press Enter. - Type the following command and press Enter:DOS
ipconfig - Look for Default Gateway under your active connection. The numerical address shown next to it is your router setup address.
On macOS (Terminal)
- Open Terminal on your Mac.
- Type the following command and press Enter:Bash
netstat -nr | grep default - Look for the IP address listed under the “Gateway” column in the output line.
Setting Up Router Passwords and Security
Your router relies on two different sets of credentials:
[ Router Credentials Structure ]
 ├── Admin Account   --> Controls system settings and administrative panels
 └── WiFi Password   --> Grants wireless devices access to local bandwidth
1. Change the Router Admin Password
Once inside the gateway dashboard, navigate to Administration, System Tools, or Account Settings. Change the default administrator password immediately to a strong, unique passphrase. Do not use the same password for your router administration account and your WiFi network.
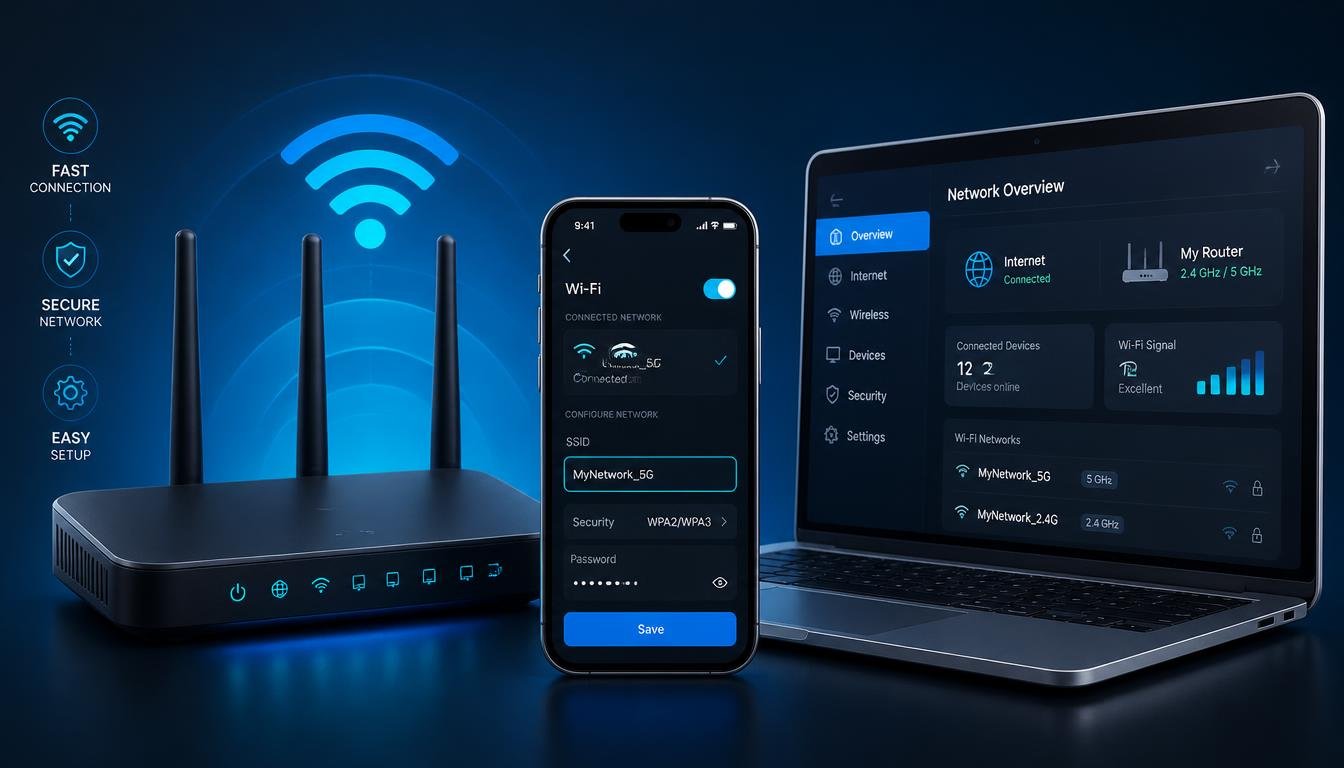
2. Configure WiFi Security Protocols
Navigate to wireless security settings and select your encryption protocol:
- WPA3-Personal: The newest standard available on modern routers. Use it when all your devices support it.
- WPA2/WPA3 Mixed Mode: Ideal when older smart home hardware or legacy laptops cannot process pure WPA3 handshakes.
- WEP or Legacy WPA: Avoid older security protocols because they are outdated and vulnerable.
Configuring Dual-Band and Tri-Band Router Settings
Modern routers operate across multiple frequencies: 2.4 GHz, 5 GHz, and 6 GHz.
- 2.4 GHz: Best for longer range and smart home devices located far from the router.
- 5 GHz: Best for faster speeds, 4K streaming, gaming, and large downloads at shorter range.
- 6 GHz: Available on WiFi 6E and WiFi 7 equipment, providing low latency and zero congestion.
Smart Connect vs. Separate WiFi Networks
- Smart Connect Enabled: Uses one single WiFi name (SSID) and automatically shifts devices to the best available frequency band.
- Smart Connect Disabled: Creates separate network names (for example,
Home_WiFi_2.4GandHome_WiFi_5G). This is useful if you own smart home devices that strictly require a 2.4 GHz signal during initial pairing.
How to Set Up a Guest Network
A guest network allows visitors or selected devices to access the internet without joining your primary network. This is ideal for smart home IoT devices that rarely receive security patches.
- Log into your router administrative panel.
- Open Guest Network Settings.
- Enable the guest network and assign a separate SSID and password.
- Enable Device Isolation (or AP Isolation) if supported, preventing guest devices from communicating with your main computers.
How to Set Up a Router Without a Modem
You can configure a router without an active internet connection if you only need a local subnet for local file transfers, wireless printing, smart home testing, or media streaming.
- Power on the standalone router.
- Connect your phone or computer to the router.
- Open the router setup page using its IP address.
- Configure local network parameters and wireless security options.
- Save your changes.
The router dashboard will report “WAN Disconnected” or “No Internet,” but all connected local devices can still communicate with each other across the local network.
Best Place to Put Your Router
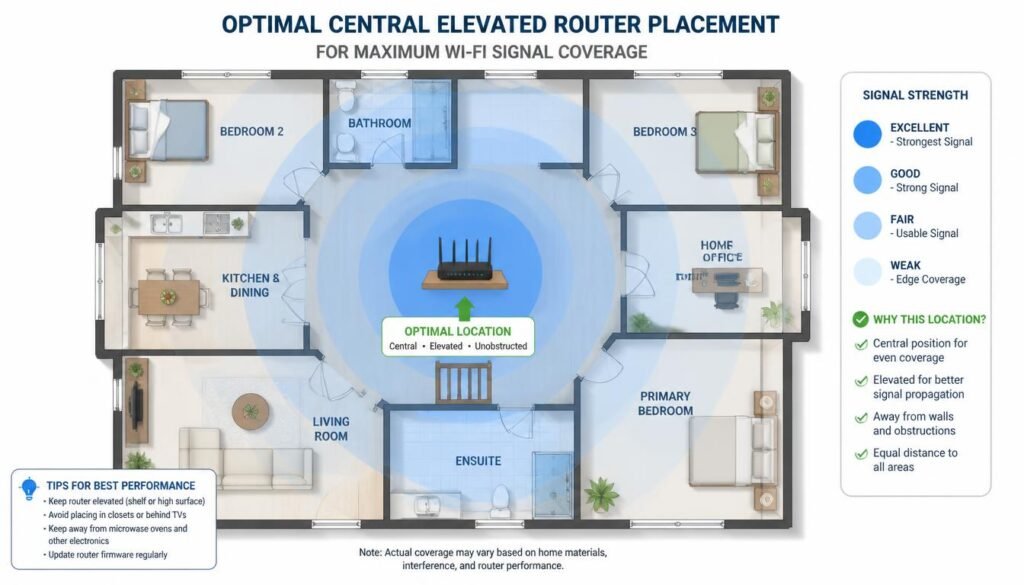
Physical placement has a major effect on wireless coverage:
- Place It Centrally: Mount or position the router near the geographic center of your home.
- Keep It Elevated: Position the hardware on a shelf elevated off the ground rather than setting it on the floor.
- Avoid Metal Obstacles: Keep the router clear of metal cabinets, thick concrete walls, and large mirrors.
- Isolate from Electronics: Maintain space between the router and microwaves or cordless phones to reduce interference.
Advanced Network Diagnostic Commands
If your device connects to WiFi but web pages fail to load, basic terminal commands can help isolate the problem.
Test the Router Loopback Connection
Open Command Prompt or Terminal and run a ping test against your gateway address:
DOS
ping 192.168.1.1
If you receive replies in 1ms to 3ms, your local physical hardware connection is working correctly. Request timeouts indicate a physical cable issue or an incorrect IP address on your local device.
Flush Your DNS Cache
If websites still fail to load after modifying router parameters, clear your local lookup cache. Follow our detailed step-by-step tutorial on how to flush DNS cache on Mac and Windows to resolve stalled domain lookup issues.
Troubleshooting Common Router Setup Problems
- Router Status Light Is Orange or RedPower cycle both devices: unplug the modem, wait 60 seconds, turn it back on, wait for the connection lights to stabilize, then power on the router. Confirm the Ethernet cable is in the WAN port.
- Ethernet Connection Is Slower Than WiFiInspect your cable casing. Ensure you are using Cat5e or Cat6 cables, as older Cat5 cables cap wired speeds at 100 Mbps. Read our detailed diagnostic guide on why Ethernet runs slower than Wi-Fi to fix interface speed drops.
- WiFi Connection Keeps DisconnectingLog into the admin panel and switch wireless channels from “Auto” to fixed non-overlapping channels (Channels 1, 6, or 11 for 2.4 GHz). For mobile device disconnection issues, check our guide on fixing Android Wi-Fi keeps disconnecting.
- Gaming Console Shows Strict NATEnable UPnP (Universal Plug and Play) in your router settings or configure dedicated Port Forwarding. You can review console-specific adjustments in our guide on fixing Xbox Series X slow download speed.
- Whole Home Network Speed UnderperformsVerify that background system tasks are not hogging bandwidth during speed testing. Check our Windows 11 slow performance troubleshooting guide for PC optimization steps.
- Changing ISPs and Installing a New RouterCoordinate activation timing with your provider to maintain continuous access. Read our guide on how to switch internet providers without downtime for migration steps.
Frequently Asked Questions
Can I set up a router myself?
Yes. Most modern home routers include setup wizards or mobile companion apps that guide you through the process without requiring a professional technician.
What is the difference between a WAN port and a LAN port?
The WAN port connects your router directly to your internet source (the modem). LAN ports connect local devices such as desktop computers, smart TVs, and consoles to the internal home network.
Should I disable WPS?
Yes. Disabling WPS (Wi-Fi Protected Setup) in your administrative panel improves network security by blocking potential PIN brute-force vulnerabilities.
How often should I update router firmware?
Check for firmware updates every three to six months, or enable automatic updates in your router administrative portal to patch security vulnerabilities automatically.
Summary: Building a Reliable Home Network
Setting up a router properly comes down to a few critical steps: connecting your internet source to the correct WAN port, powering your equipment on in the correct sequence, completing the setup wizard, and securing both your administrator account and WiFi passphrase. Taking a few extra minutes to configure strong security, check for firmware updates, and optimize hardware placement ensures a fast, stable, and secure connection across all your home devices.
Final Thoughts
Setting up your router correctly is only half the battle; keeping it performing at its best requires minimal ongoing maintenance. A quick monthly reboot clears bogged-down router memory and resets stale internal connections. Additionally, periodically auditing connected devices through your admin dashboard ensures no unauthorized hardware eats up your bandwidth. By pairing proper physical setup with modern security practices like WPA3, your home network will stay fast, reliable, and secure for years to come.