How to Change Monitor Screen Resolution Fix In 60 sec (2026)
Your desktop suddenly looks stretched, your icons are the wrong size, or a game locked your display to a resolution your monitor was never meant to run, and every menu you open seems to hide the setting you actually need. Learning how to change monitor screen resolution is a five second task once you know the exact path, but the option can also disappear entirely when a driver, a cable, or a scaling conflict gets in the way, which is why this guide covers the setting itself along with every failure mode that blocks it.
Quick Answer
To change monitor screen resolution in Windows, right click an empty part of the desktop, select Display Settings, scroll to the Display Resolution dropdown, and choose the value marked Recommended for your screen. Click Keep Changes when the confirmation prompt appears, or Windows will revert automatically after fifteen seconds.
Display Resolution Matrix: Which Setting Fits Your Monitor
Before adjusting anything, match your resolution to your actual screen size using the table below. Running a resolution higher than your panel supports produces a blank screen, while running one lower produces a blurry, oversized image.
| Display Resolution | Aspect Ratio | Common Screen Sizes | Recommended Use Case |
|---|---|---|---|
| 1366 x 768 (HD) | 16:9 | 11.6 to 15.6 inch budget laptops | Basic browsing, office documents, low power hardware |
| 1920 x 1080 (FHD) | 16:9 | 21.5 to 27 inch monitors, most laptops | General use, mainstream gaming, video streaming |
| 2560 x 1440 (QHD) | 16:9 | 27 to 32 inch monitors | Photo editing, competitive gaming, multitasking |
| 3840 x 2160 (4K/UHD) | 16:9 | 27 inch and larger monitors, TVs | Video editing, design work, high end gaming |

How to Change Monitor Screen Resolution on Windows 11 and Windows 10
The core steps for how to change monitor screen resolution windows 11 and Windows 10 users need are nearly identical, since both versions route through the same modern Settings app rather than the legacy Control Panel.
How to Change Monitor Screen Resolution Through Windows Settings
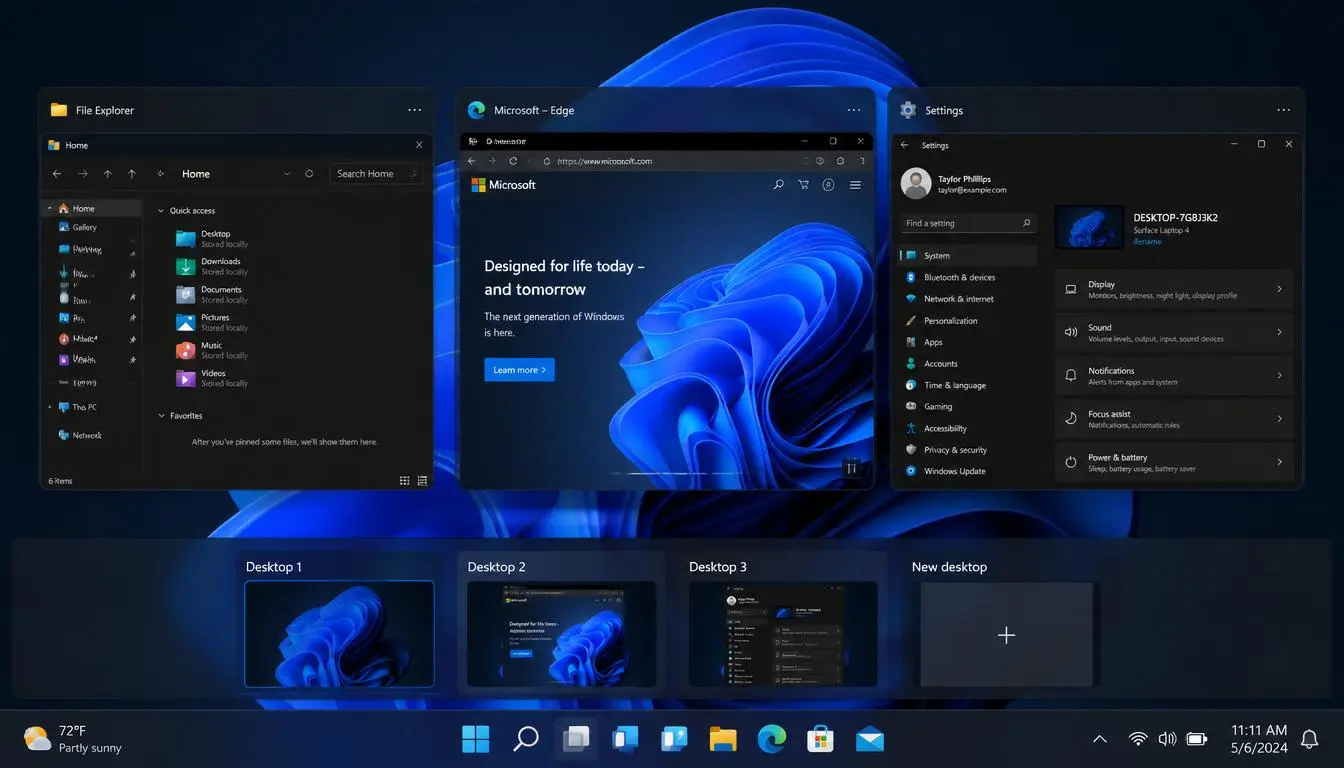
Right click any empty area of the desktop and select Display Settings from the context menu. On a system with multiple monitors, click the numbered display you intend to adjust in the diagram at the top of the page before making any changes, since Windows applies the new value only to the currently selected screen. Scroll down to the Display Resolution section, open the dropdown, and select the value marked Recommended, which corresponds to your panel’s native pixel count in almost every case. When the Keep These Display Settings prompt appears, click Keep Changes to confirm; if you take no action, Windows reverts automatically after fifteen seconds to protect against a resolution that leaves the screen unreadable.
Using the Legacy Control Panel Method
Some users searching how to change screen resolution Windows 10 still prefer the older interface, which remains functional in both operating systems. Press the Windows key plus R, type control, and press Enter to open Control Panel. Select Appearance and Personalization, then Display, then Change Display Settings. Use the Resolution slider to select a value and click Apply. This path is functionally identical to the Settings app method and exists mainly for users on older workflows or accessibility tools that still reference Control Panel by name.
Adjusting Scale and Layout Alongside Resolution
Display resolution settings windows users often confuse with a genuinely separate control called scaling. Resolution changes the actual pixel count rendered on screen, while scale and layout enlarges or shrinks text, icons, and interface elements without touching the underlying pixel grid. If everything on screen looks correctly sharp but simply too small to read comfortably, adjust the Scale percentage under the same Display Settings page instead of lowering the resolution, since lowering resolution to compensate for small text nearly always produces a blurrier result than raising scale.
How to Adjust Screen Size to Fit Monitor When Display Is Cut Off or Stretched
Readers searching adjust screen size to fit monitor windows 11 are usually dealing with a different problem than a wrong resolution value. This symptom, sometimes called overscan, happens when the image extends slightly past the visible edge of the panel, most commonly on displays connected through HDMI to a television or an older monitor.

How to Change Monitor Screen Resolution?
Fixing Overscan Through Windows Display Settings
Right click the desktop, open Display Settings, and select the affected monitor from the diagram. Scroll to Scale and Layout and confirm the value is set to the option marked Recommended rather than a custom percentage carried over from a different display. A scaling value inherited from a previous monitor, which happens often when moving a laptop between a docking station and a standalone screen, is one of the most common causes of an image that appears cut off along the edges.
Correcting Overscan in NVIDIA Control Panel
Right click the desktop and select NVIDIA Control Panel if an NVIDIA graphics card is installed. Expand Display in the left panel and select Adjust Desktop Size and Position. Choose the correct display if more than one is connected, then use the Perform Scaling On slider to reduce the scan area until the entire desktop, including the taskbar, is fully visible. Click Apply to lock in the change.
Correcting Overscan in AMD Software
Open AMD Software by right clicking the desktop and selecting the AMD option, then navigate to the Display tab. Locate the Scaling Mode option and select Center Image or GPU Scaling, then use the underscan slider to pull the visible image back within the panel’s actual boundaries. Anyone whose stretched display appeared right after a driver update may also want to review this site’s guide on diagnosing broader computer monitor display issues, since a scaling problem and a genuine hardware fault share several overlapping symptoms.
How to Get 1920×1080 or 2560×1440 Resolution When the Option Is Missing
A missing resolution option is one of the most frequently searched display problems, and it covers both how to get 1920×1080 resolution on a 1366×768 screen Windows 11 users report and cases where a monitor’s native QHD or 4K value simply will not appear in the dropdown.

Forcing Hidden Resolutions With List All Modes
Right click the desktop, select Display Settings, then scroll down and click Advanced Display Settings. Select Display Adapter Properties for the monitor in question, and in the window that opens, click the Adapter tab. Click List All Modes, which reveals every resolution and refresh rate combination the connected graphics hardware is technically capable of outputting, including values the standard Display Resolution dropdown hides. Select the target resolution from the full list, click OK, then Apply, and confirm Keep Changes when prompted. Most competing guides skip this exact path entirely, even though it is the single most reliable fix for a resolution that appears to be missing rather than genuinely unsupported.
Creating a Custom Resolution
When even List All Modes does not surface the needed value, both NVIDIA Control Panel and AMD Software allow a custom resolution to be created manually. Under Display in NVIDIA Control Panel, select Change Resolution, then Customize, and enter the exact horizontal and vertical pixel values along with a refresh rate the cable and monitor can support. AMD Software offers the same function under Display, Custom Resolutions. Test any custom value carefully, since an unsupported combination can produce a black screen until the automatic fifteen second revert restores the previous setting.
Why the Option Disappears in the First Place
A resolution option goes missing almost exclusively for one of three reasons: the graphics driver installed is the generic Microsoft Basic Display Adapter rather than the manufacturer’s full driver, the physical cable cannot carry enough bandwidth for the target resolution and refresh rate, or the monitor’s EDID data was not read correctly during the handshake with the graphics card. Open Device Manager, expand Display Adapters, and check the listed driver name; if it reads Microsoft Basic Display Adapter instead of an Intel, NVIDIA, or AMD model name, visit the manufacturer’s site and install the correct driver before attempting any resolution change again.
Cable Bandwidth Limits Behind Missing Resolutions
A cable that looks correct can still be the reason a target resolution refuses to appear, since not every HDMI or DisplayPort cable carries the same bandwidth. HDMI 1.4 supports a maximum of 1920 x 1080 at 60Hz or 4K at a limited 30Hz, while HDMI 2.0 and later support full 4K at 60Hz and beyond. DisplayPort 1.2 comfortably handles QHD and most 4K signals, while DisplayPort 1.4 and 2.0 are required for higher refresh rate 4K gaming. When a target resolution will not appear even after a fresh driver install, confirm the cable generation printed on the connector or packaging matches the bandwidth the desired resolution and refresh rate combination actually requires.
How to Change Monitor Screen Resolution on Lenovo and OEM Laptops
Lenovo and other OEM laptops introduce an extra layer that generic Windows guides tend to skip entirely: manufacturer software that can override the resolution set inside Windows itself.
Managing Intel Graphics Command Center Overrides
Many Lenovo laptops with Intel integrated graphics ship with Intel Graphics Command Center, which maintains its own display profile separate from the Windows Settings app. Open the app from the Start menu, select Display, and confirm the resolution and scaling values match what was set inside Windows Display Settings. A mismatch here is a common reason a resolution change made in Windows appears to revert on its own after a restart. Readers dealing with broader display faults on this laptop line may also find it useful to check this site’s dedicated guide to fixing Lenovo laptop screen problems, which covers driver conflicts specific to that hardware.
Configuring External Monitor Dual Screen Profiles
Connecting an external display to a Lenovo or other OEM laptop introduces a second resolution profile that must be set independently. Press the Windows key plus P to choose between Duplicate, Extend, and Second Screen Only modes, then return to Display Settings and select each monitor individually from the diagram to confirm its resolution is correct, since a resolution set on the laptop’s internal panel does not automatically transfer to a newly connected external screen.
Frequently Asked Questions
How do I change my monitor to 1920×1080?
Right click the desktop, select Display Settings, open the Display Resolution dropdown, and choose 1920 x 1080 if it is marked Recommended. If the value does not appear in the standard dropdown, use Advanced Display Settings, Display Adapter Properties, and List All Modes to force it into view.
How do I change screen resolution to 2560×1440?
Follow the same Display Settings path and select 2560 x 1440 from the dropdown, provided the monitor’s native resolution supports QHD. If the option is missing, confirm the cable in use is DisplayPort 1.2 or newer, or HDMI 1.4 or newer, since older cable revisions cannot carry the required bandwidth.
How do I resize the display screen?
Resizing what appears on screen without changing the underlying resolution is done through Scale and Layout rather than the resolution dropdown itself. Open Display Settings, locate the Scale option, and choose a higher or lower percentage to enlarge or shrink text, icons, and interface elements.
How do I fix 1920×1080 resolution not showing?
Update the graphics driver directly from the manufacturer’s site rather than relying on Windows Update alone, since a generic Basic Display Adapter driver frequently hides standard resolution values. If the driver is already current, use the List All Modes button under Display Adapter Properties to reveal the full list of supported resolutions.
Why is my screen resolution greyed out in Windows settings?
A greyed out resolution setting almost always points to a missing or generic graphics driver rather than a hardware limitation. Open Device Manager, expand Display Adapters, right click the listed adapter, and select Update Driver, choosing Search Automatically For Drivers to restore full control over the resolution menu.
How do I get 1920×1080 resolution on a 1366×768 screen in Windows 11?
A 1366 x 768 panel cannot physically display 1920 x 1080 at native sharpness, since it has fewer physical pixels than the target resolution requires, though Windows can render a higher resolution and downscale it with reduced clarity through the custom resolution tool in NVIDIA Control Panel or AMD Software. Expect noticeably softer text and images compared with a monitor whose native resolution is actually 1920 x 1080.
What is the difference between display resolution and display scaling?
Display resolution controls the exact number of pixels rendered on the screen, while display scaling controls how large text, icons, and interface elements appear without altering that pixel count. Lowering resolution to make items larger typically produces a blurrier image, while raising scale keeps the display sharp at its native resolution.
How do I reset display resolution settings back to default?
Open Display Settings, select the Display Resolution dropdown, and choose the value marked Recommended, which restores the monitor’s native resolution in nearly every case. If the display is too distorted to navigate menus, restart into Safe Mode, where Windows automatically loads a universally supported default resolution.
Why does my monitor look blurry after changing resolution?
A blurry image after a resolution change usually means the selected value falls below the monitor’s native resolution, forcing the panel to stretch a lower pixel count across its full physical size. Return to Display Settings and select the resolution marked Recommended to restore the sharpest available image.
How do I change resolution on a dual monitor setup independently?
Open Display Settings, click the numbered monitor you want to adjust in the diagram at the top of the page, and change its resolution using the dropdown below; Windows applies the change only to the selected display, leaving the second monitor’s resolution untouched. Repeat the process for the second display if it also needs a different value.
Final Notes on Keeping Your Display Configured Correctly
Most resolution problems trace back to one of three sources: an incorrect value selected in Display Settings, a graphics driver that is outdated or generic, or a cable that cannot carry the bandwidth the target resolution and refresh rate combination actually requires. Once the correct resolution is set and confirmed, background maintenance tasks such as pausing automatic Windows updates before they overwrite a working driver configuration help prevent the setting from reverting unexpectedly after a feature update installs in the background.
Readers running a laptop alongside an external display may also want to confirm their screen dimensions before shopping for a replacement panel or a protective case, using this site’s guide on measuring a laptop screen size accurately. For systems that feel sluggish after a resolution or driver change, a walkthrough on using a Windows 11 debloater to safely boost PC speed covers safe steps for freeing up background resources without touching display settings again. Anyone whose display appears rotated or mirrored after a driver reinstall can also review the dedicated guide on correcting a rotated or mirrored monitor for a complete fix path.