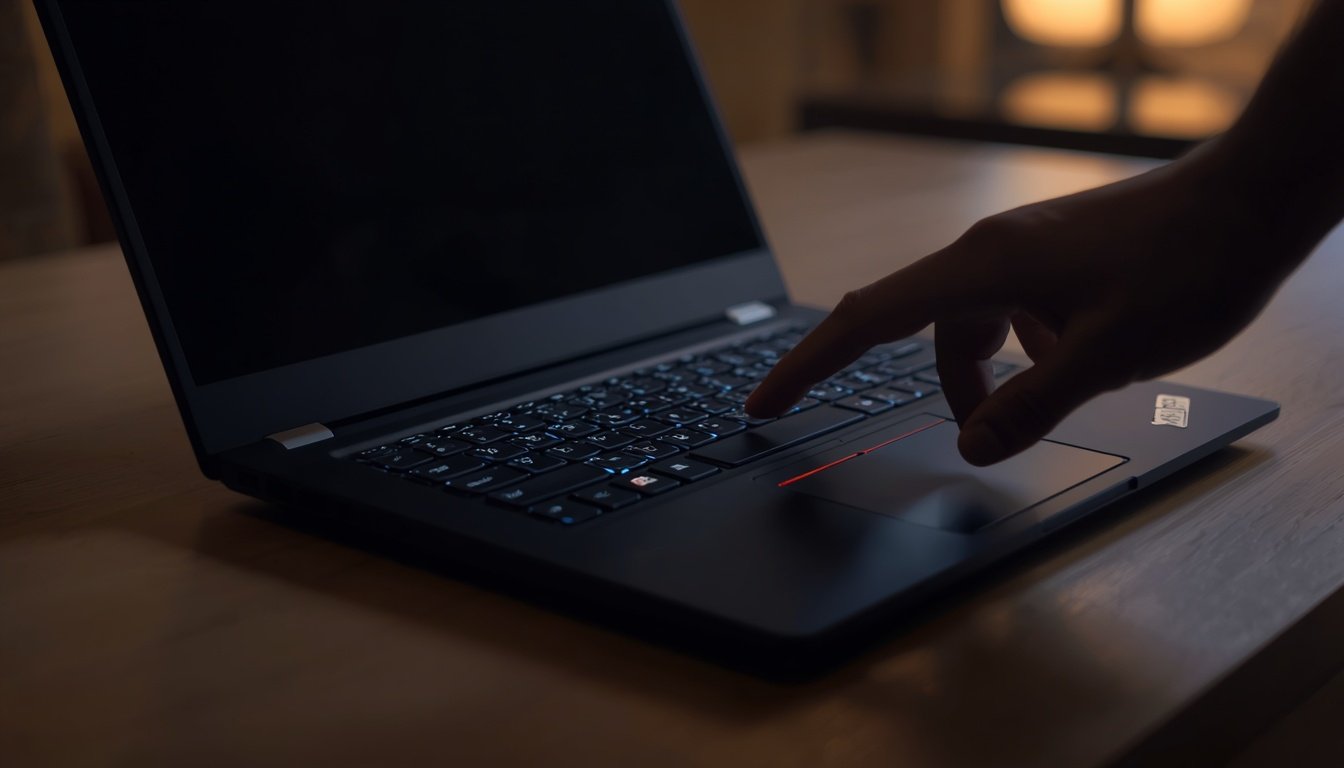
Your Lenovo display is vibrating, jumping, or rippling across the panel and every second it continues, the urgency builds. Whether it started after a driver update, a Windows feature drop, or completely out of nowhere, a shaking screen is one of the most disorienting hardware symptoms a laptop user can face. The good news is that Lenovo laptop screen shaking follows a predictable set of root causes, and every single one of them has a documented fix.
Quick Answer
Lenovo laptop screen shaking is primarily caused by either a display driver communication timing error that desynchronizes the GPU signal pipeline, an unstable display refresh frequency configuration that forces the panel to operate outside its certified operating range, or a physically worn eDP ribbon cable inside the hinge assembly that introduces voltage drops and signal noise directly into the video data stream. Identifying which of these three categories your situation falls into takes less than five minutes using the diagnostic steps below.
Note that internal network hardware can occasionally emit signal noise that impacts surrounding video components. If you are configuring your wireless environment to minimize local signal interference while troubleshooting, you can follow our simple manual on how to find ssid of wifi to secure your router connection details safely.
Lenovo Laptop Screen Shaking
What Causes Lenovo Laptop Screen Shaking?
Before touching a single setting, you need to understand the three diagnostic categories. Mixing up a hardware fault with a software fault wastes hours.
Category 1
Driver and GPU Signal Timing Errors: The display driver acts as the translation layer between your GPU and your LCD panel. When this layer becomes corrupted, mismatched with the operating system version, or conflicts with a second graphics adapter (which is extremely common on dual-GPU Lenovo models like the Legion, LOQ, and IdeaPad Gaming), the GPU sends frame timing instructions the panel cannot interpret correctly. The result is a rhythmic shake or rapid flicker.
Category 2
Refresh Rate and Panel Frequency Mismatch: Your LCD panel is certified to operate at one or more specific refresh rates 60Hz, 120Hz, 144Hz, or 165Hz depending on the model. When Windows or a third-party application forces the panel to attempt an uncertified rate (for example, a gaming overlay pushing a 60Hz IPS panel toward 144Hz), the timing controller inside the panel fails to synchronize frames properly. The panel shakes because it is being asked to do something its hardware cannot execute.
Category 3
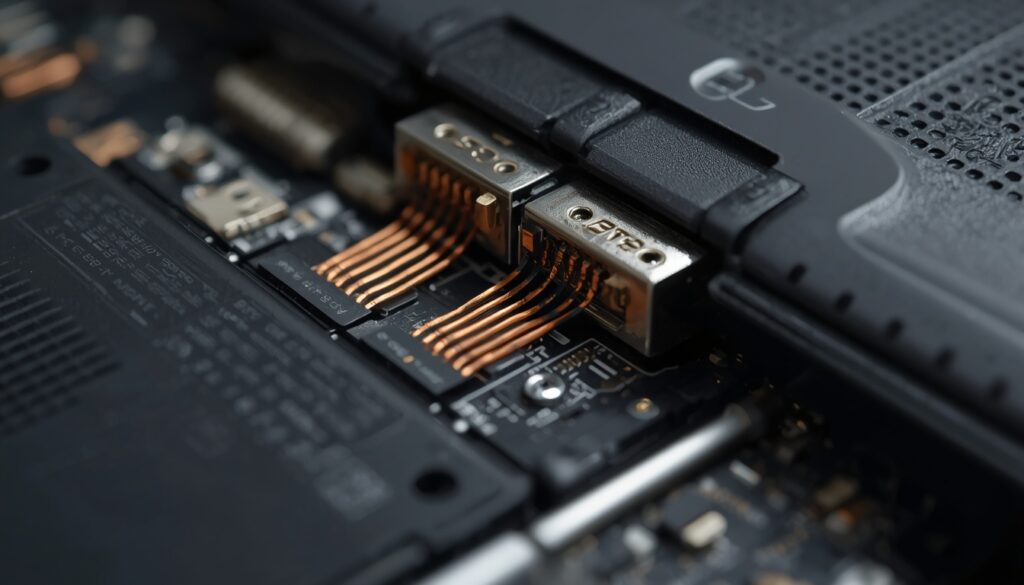
Physical eDP Cable Degradation: The embedded DisplayPort cable is the thin ribbon that carries video data from the motherboard to the LCD panel, routing through the mechanical hinge. Every time you open or close your laptop lid, this cable flexes. After thousands of cycles or after a physical impact the individual copper conductors inside the ribbon develop micro-abrasions. These micro-fractures act like intermittent resistors: they cause voltage drops and inject signal noise directly into the video stream. The panel interprets this as corrupted frame data and displays it as shaking or horizontal bands.
Understanding these three categories is the foundation of everything that follows.
Initial Isolation Testing for Lenovo Display Vibrations
Never begin applying fixes before you know what you are fixing. These two quick tests take under three minutes and will tell you everything.
Running the Windows Task Manager Verification Test
This is the single most powerful diagnostic test for Lenovo laptop screen shaking, and almost no published guide covers it. Here is how to execute it correctly.
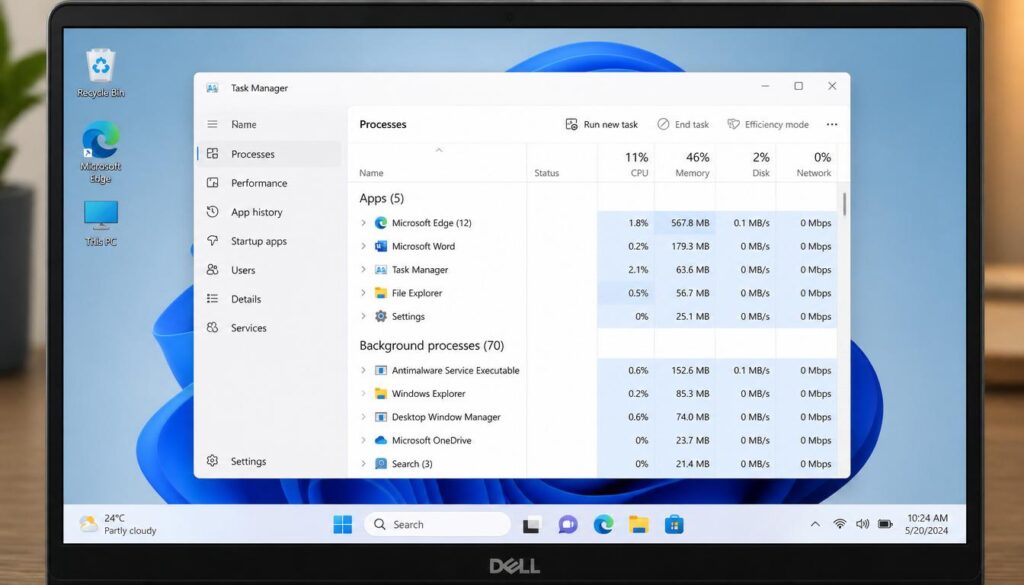
Press Ctrl + Shift + Esc to open Task Manager. Now watch your screen carefully.
Scenario A
Task Manager shakes along with everything else on the screen. This tells you the problem exists at the driver or GPU hardware level. The display driver is corrupted or is sending a malformed signal to the panel. Task Manager renders through DirectX and the display driver stack, so if it shakes, the entire output pipeline is compromised.
Scenario B
Task Manager stays sharp and stable while the rest of the screen shakes. This is a critical distinction. Task Manager uses a rendering path that bypasses certain application-level compositor calls. If Task Manager is stable but your desktop, browser, or applications shake around it, you are looking at an incompatible software application or a system compositor conflict not a driver issue. The fix path is completely different.
Write down which scenario you observed. Every step that follows branches from this result.
Lenovo Laptop Screen Shaking
The System BIOS and External Monitor Verification Test
This two-part test separates software problems from hardware problems with absolute certainty.
External Monitor Test: Connect your Lenovo to an external monitor using an HDMI cable. If the external monitor displays a clean, stable image while your laptop screen shakes, the problem is isolated to the internal display panel or the internal eDP cable not the GPU and not the driver. If both screens shake, the GPU or its driver is the source.
BIOS Screen Test: Restart your Lenovo and press F2 or F12 during startup to enter the BIOS firmware interface. The BIOS renders directly through hardware, completely bypassing Windows, all drivers, and all software. If the screen shakes inside the BIOS interface, you have a confirmed hardware fault — either the eDP cable or the LCD panel itself. If the screen is perfectly stable inside BIOS, the problem is entirely within the Windows software stack and is fully fixable without touching hardware.
These two tests together give you a definitive diagnosis before you spend a single minute on driver reinstallations or settings changes.
Fixing Software and Driver Configuration Glitches
If your Task Manager test pointed to a driver issue, or if your BIOS screen was stable, start here.
Executing Clean Driver Reinstallations via Windows Device Manager
A standard driver update does not remove the old driver’s registry entries, cached configurations, and timing parameters. A clean reinstallation does. Follow this sequence precisely.
- Right-click the Start button and select Device Manager.
- Expand the Display adapters section. You will likely see two entries on most Lenovo gaming laptops: one Intel integrated graphics adapter and one NVIDIA or AMD discrete adapter.
- Right-click the primary adapter and select Uninstall device. When prompted, check the box that reads “Delete the driver software for this device” this is mandatory. Without checking this box, Windows will reinstall the same corrupted driver files automatically.
- After uninstalling the first adapter, repeat the process for the second adapter if your Lenovo has dual graphics.
- Do not restart yet. Instead, visit the official Lenovo support page at support.lenovo.com, enter your laptop’s model number, and download the latest certified display driver directly from Lenovo not from Windows Update and not from the GPU manufacturer’s generic driver page. Lenovo tests and certifies specific driver builds for each model. Generic NVIDIA or Intel drivers frequently miss model-specific optimizations and can reintroduce the same shaking problem.
- Restart the system and run the downloaded installer.
- After the driver installation is complete, restart one more time and observe whether the Lenovo laptop screen shaking has stopped.
Resetting Advanced Graphic Command Settings
Two specific settings cause a disproportionate number of Lenovo laptop screen shaking incidents, and both are disabled incorrectly in default configurations.
Intel Panel Self-Refresh (PSR): This is a power-saving feature built into Intel integrated graphics. When PSR is active, the GPU periodically stops refreshing the display and instructs the panel to hold the last frame from its internal buffer. On many Lenovo IPS and OLED panels, PSR creates a visible shimmer or shake at the moment the GPU resumes refreshing particularly noticeable when moving windows or scrolling. To disable it:
Open the Intel Graphics Command Center (searchable from the Start menu). Navigate to System > Power and set the panel self-refresh option to Disabled. If you are on an older Intel driver, this setting appears inside Intel HD Graphics Control Panel > Power > Display Power Saving Technology.
G-Sync and Advanced Optimus Switching Conflicts: This issue is specific to Lenovo LOQ, Legion, and IdeaPad Gaming models that use NVIDIA Advanced Optimus technology. Advanced Optimus dynamically switches between the integrated Intel GPU and the discrete NVIDIA GPU based on workload demand. When G-Sync or FreeSync is enabled simultaneously, the switching event the moment the system hands off rendering responsibility from Intel to NVIDIA can cause a frame synchronization breakdown. The display does not know which timing reference to follow, and it shakes during the transition.
To resolve this, open the NVIDIA Control Panel, navigate to Manage 3D Settings, and set the preferred graphics processor to either “Integrated graphics” (for light workloads and general use) or “High-performance NVIDIA processor” (for gaming). Avoid leaving it on the “Auto-select” setting if you are experiencing shaking. Then navigate to Display > Set up G-SYNC and ensure G-Sync is only enabled for full-screen mode — not windowed mode to reduce switching events.
Correcting Display Refresh Rates in Advanced Windows Options
An incorrect refresh rate forces your panel to operate outside its certified specification. This is one of the most overlooked causes of Lenovo laptop screen shaking, particularly on gaming Lenovo models where the panel is sold in multiple refresh rate configurations.
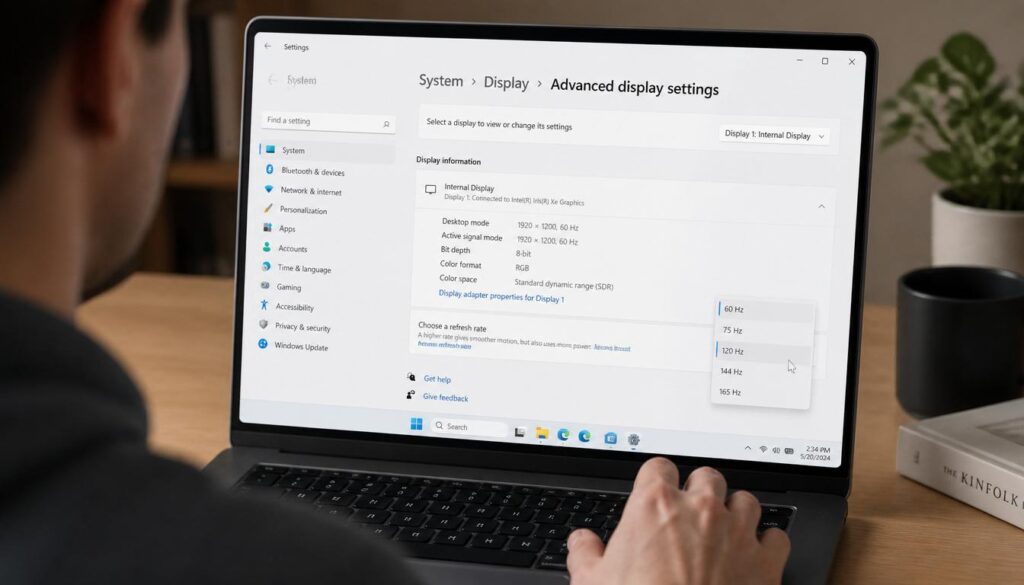
- Right-click your desktop and select Display settings.
- Scroll down to Advanced display settings.
- Click Display adapter properties for Display 1.
- Select the Monitor tab.
- In the Screen refresh rate dropdown, make sure the selected rate matches your panel’s native specification. A 60Hz panel should run at 60Hz. A 144Hz panel should run at 144Hz. Running a 60Hz panel at 75Hz which some Lenovo BIOS configurations accidentally enable is enough to cause continuous screen shaking.
- Click Apply, then OK.
Lenovo Laptop Screen Shaking
If you are unsure of your panel’s native refresh rate, find your exact laptop model number (printed on the bottom of the chassis) and look it up on the Lenovo product specification page at psref.lenovo.com.
Addressing System Component File and Chipset Corruption
If your Lenovo laptop screen shaking persists after driver reinstallation and settings corrections, Windows system file corruption may be responsible. This is more common than most users realize, and it occurs frequently after failed Windows Update installations.
Open the Command Prompt as Administrator (search “cmd” in the Start menu, right-click, and select “Run as administrator”). Run the following two commands in sequence.
First, run the Deployment Image Servicing and Management tool:
dism /online /cleanup-image /restorehealth
This command connects to Windows Update servers and replaces any corrupted system image components. Allow it to complete fully it can take between 10 and 25 minutes depending on your connection speed. Do not interrupt it.
After it completes, run the System File Checker:
sfc /scannow
This command scans every protected Windows system file and replaces any corrupted or missing files from the local cached copy that DISM just repaired. A summary of any repaired files will appear in the command window when it finishes.
Restart your laptop after both commands complete. In cases where display driver corruption is rooted in underlying system file damage, these two commands eliminate the problem entirely.
Physical Hardware Diagnostics: The eDP Cable and LCD Panel Matrix
If your BIOS screen test showed shaking inside the firmware interface, or if the external monitor test showed a stable image on the external display while your internal screen shook, you are dealing with a hardware fault. There are two components responsible: the eDP cable or the LCD panel itself.
Understanding eDP Cable Hinge Fatigue
The embedded DisplayPort cable is a thin, flexible ribbon approximately 2 to 4 millimeters wide. It runs from the display controller on the motherboard, through the hinge barrel, and up through the display lid to connect directly to the LCD panel’s driver board. This routing through the hinge is the critical failure point.
Every open and close cycle mechanically stresses the cable at the point where it bends through the hinge. Over time typically after 10,000 to 15,000 hinge cycles, which represents roughly 3 to 5 years of average use the individual copper conductors inside the ribbon develop micro-abrasions. These are not visible breaks. They are microscopic stress fractures that increase the electrical resistance of specific conductors.
The consequence is twofold. First, the increased resistance causes voltage drops that corrupt the precise timing signals the display controller sends to the panel. Second, the damaged conductors act as antennas that pick up electromagnetic noise from nearby components the fan motor, the wireless card, and the motherboard power rails. This noise is injected directly into the video data stream. The panel interprets the corrupted data as legitimate frame instructions and executes them producing the characteristic shake, ripple, or horizontal banding pattern.
The key diagnostic signature of eDP cable failure is that the shaking changes when you physically manipulate the lid. Open your laptop and, with one hand, very slowly adjust the lid angle while watching the screen. If the shaking stops at a specific angle, or if it intensifies when you flex the lid slightly sideways, the eDP cable is damaged at the hinge point. This confirms the diagnosis without opening the chassis.
Diagnosis: LCD Panel Timing Controller Failure
If the shaking does not change with lid position manipulation, but the BIOS screen is still shaking, the fault moves from the cable to the panel itself. The timing controller (TCON) board is the small circuit board attached directly to the back of the LCD panel. It receives the video signal from the eDP cable and converts it into the row-by-row scanning instructions that drive the individual pixel rows. When the TCON fails due to manufacturing defects, heat stress, or physical impact it produces the precise shaking and horizontal line artifacts that users describe as Lenovo laptop screen shaking.
A failed TCON board cannot be repaired in the field. The only correct resolution is a full LCD panel replacement.
Comparison: Software Timing Desynchronization vs. Physical eDP Cable Fatigue
| Diagnostic Parameter | Software Timing Desynchronization | Physical eDP Cable Fatigue |
|---|---|---|
| BIOS screen behavior | Stable (no shake) | Shaking present inside BIOS |
| External monitor output | May also shake | Clean and stable |
| Task Manager behavior | Shakes (driver issue) or stable (app issue) | Always shakes |
| Lid angle manipulation | No effect on shaking | Shaking changes with lid position |
| Onset pattern | Sudden, often after update | Gradual, worsening over weeks |
| Affected refresh rates | Variable rates | All refresh rates |
| Typical repair cost | Free (software fix) | $40 to $150 USD (cable replacement) |
| DIY feasibility | Fully self-serviceable | Moderate technical skill required |
| Lenovo warranty applicable | Only if under warranty | Yes, especially on new units |
Lenovo Warranty Extension and Panel Replacement Protocols
Before paying for any hardware repair, verify your warranty coverage. Lenovo provides two primary pathways.
Standard Warranty Check: Visit support.lenovo.com/warrantylookup and enter your laptop’s serial number (found on the bottom of the chassis or inside the BIOS system information screen). A verified hardware fault including eDP cable failure and LCD panel TCON failure is covered under Lenovo’s standard one-year and optional extended warranty programs.
Lenovo Premium Care: If your unit is enrolled in Lenovo Premium Care or Premium Care Plus, onsite hardware repair is available. A Lenovo-certified technician will replace the eDP cable or the full display assembly at your location.
Out-of-Warranty Hardware Repair: If your unit is outside the warranty period, two options exist. First, a third-party repair shop can replace the eDP cable. The cable itself costs between $8 and $25 USD depending on the model, and the total repair including labor typically falls between $40 and $100 USD. Second, an experienced user can perform a DIY replacement using a replacement cable sourced from eBay, AliExpress, or a Lenovo parts distributor such as Parts-People.com. The procedure requires removing the display bezel, disconnecting the old cable at both ends, routing the new cable through the hinge, and reconnecting. Most Lenovo display lid assemblies can be accessed with a plastic spudger and a set of Torx screwdrivers.
LCD Panel Replacement: A full panel replacement is necessary when the TCON board has failed. Replacement panels for common Lenovo models are available from third-party suppliers for between $60 and $180 USD depending on the panel resolution and refresh rate specification. Always verify the panel part number against your specific model using the Lenovo service parts database to ensure compatibility.
Frequently Asked Questions
Why is my Lenovo laptop screen shaking only when it is unplugged from the power adapter?
This is a power profile behavior. When your Lenovo switches to battery power, Windows automatically activates power-saving display features including Intel Panel Self-Refresh and dynamic brightness adjustment that can introduce shaking on susceptible panels. Open the Intel Graphics Command Center and disable Panel Self-Refresh, then set your battery power plan to “Balanced” rather than “Power saver” in Windows Power Options.
My Lenovo laptop screen shaking only appears when I open a specific game or application. What does this mean?
Refer back to the Task Manager test. If Task Manager remains stable during the shaking, this is a software-layer conflict specific to that application. The application is likely requesting a non-native display mode, triggering a compositor conflict, or conflicting with your NVIDIA or AMD overlay. Try running the application in windowed mode rather than fullscreen, or disable any in-application frame-rate limiters. Also check if the application has a compatibility mode setting by right-clicking its executable and selecting Properties, then Compatibility.
Can a Lenovo laptop screen shaking problem damage the display permanently?
Software-induced shaking does not damage the LCD panel. The panel is simply receiving a correctly-timed or oddly-timed signal neither state causes physical damage to the panel matrix. However, if the root cause is eDP cable degradation, leaving it unrepaired allows the cable to continue deteriorating. Eventually, a degraded cable can cause complete signal loss rather than just shaking, at which point the panel may appear completely black or show severe permanent artifacts.
How do I know if my Lenovo laptop screen shaking is covered under warranty?
Hardware faults — including eDP cable failure, LCD panel failure, and GPU hardware failure are covered under Lenovo’s standard limited warranty. Software problems are generally not warranty service items. Use the BIOS test and external monitor test described earlier to confirm you have a hardware fault, then contact Lenovo support at support.lenovo.com or call 1-855-253-6686 (US) with your serial number ready.
My Lenovo LOQ or Legion screen started shaking after I enabled G-Sync. How do I fix it?
This is the G-Sync and Advanced Optimus conflict described earlier. Open the NVIDIA Control Panel, navigate to Display, and disable G-Sync. Then set your preferred graphics processor to a fixed option either integrated or discrete rather than Auto-select. Re-enable G-Sync only in fullscreen mode after testing stability. Many LOQ and Legion users resolve this permanently by running in discrete GPU-only mode (MUX switch to dGPU mode in Lenovo Vantage) and enabling G-Sync exclusively in that configuration.
Is Lenovo laptop screen shaking a common manufacturing defect on specific models?
Certain Lenovo IdeaPad models from the 2020 to 2022 production period exhibited a higher-than-average incidence of eDP cable hinge fatigue due to a tighter hinge radius in the cable routing path. Lenovo quietly extended service programs on some of these units. Check the Lenovo community forums and contact Lenovo support directly to ask whether your specific model number has an active service advisory or extended repair program covering display shaking symptoms.
Summary: Your Complete Fix Sequence
- Run the Task Manager test to determine whether the problem is at the driver level or the application level.
- Run the external monitor test and the BIOS screen test to rule out hardware faults.
- If hardware is ruled out, perform a clean driver reinstallation using Lenovo-certified drivers.
- Disable Intel Panel Self-Refresh and resolve any G-Sync or Advanced Optimus switching conflict.
- Verify that your refresh rate matches the panel’s native specification.
- Run DISM and SFC to repair any underlying Windows system file corruption.
- If hardware is confirmed, perform the lid-angle test to isolate eDP cable failure from panel TCON failure.
- Contact Lenovo warranty support or proceed with a third-party repair depending on your coverage status.
Every instance of Lenovo laptop screen shaking has a root cause that fits within this framework. Work through the sequence systematically and you will find it.
Finding the correct display replacement requires knowing the exact physical specifications of your device model. Before purchasing a new LCD panel or ordering component parts, look through our easy guide on how to measure laptop screen size to ensure you secure the exact dimensions for a perfect hardware fit.
For related guides, see our articles on How to Fix Lenovo Laptop Screen Problems, White Spots on Lenovo Laptop Screen, and Lenovo Laptop Screen Flickering with Horizontal Lines.